Be back next week when I'm feeling better. Wish me luck.
Tuesday, October 21, 2014
Lemons
Life has totally thrown me a great big bunch of lemons lately. Trying to make the best if it but I need a little time to heal before I get back down to business. Therefore I have decided to take a week off of the blog.
Sunday, October 19, 2014
Aphrodite

Butterfly helped me cut out the material for her cape tonight. No pattern we just winged it and it came out great. Next up it was time to do Monkey's cape for her Aphrodite costume. Butterfly found the most amazing light pink fabric with silver sparkles on it for the cape and I found a great little pin on how to make your own no sew Elsa cape I figured would work out great.
The pin had you make your own pattern, but I didn't have the right kind of paper and wasn't up for taping together a million pieces of computer paper so I just winged it on the fabric itself. Here is how I did it. You can find the actual pin here with great directions ( http://www.makeit-loveit.com/2014/03/no-sew-elsa-cape-from-frozen-a-do-it-together-project.html).
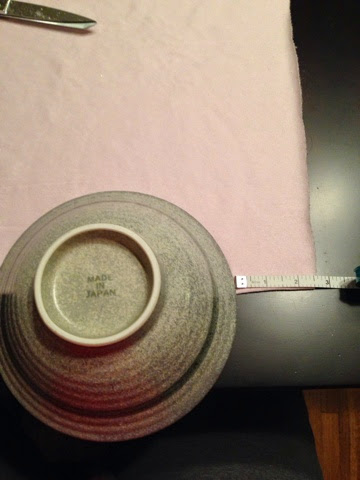
Step 1: I measured Monkey from collar bone up over the shoulder and down to the floor. This will be the length if the cape. The pin called for an 18" width.
Step 2: Here is where you would make your pattern. Refer to original pin for instructions.
I deviated because I was cutting it directly from the fabric without a pattern. I folded the fabric salvages together and designated one side to be the top of the garment.
I started off by making the neck hole. Measure 2.5" down from the top of the fabric and place a small bowl (4-6" in diameter) at this point with only half the bowl on the fabric. Make sure to do this on the fold of the fabric.
Cut around the bowl and round out the edges for the neck piece as shown.
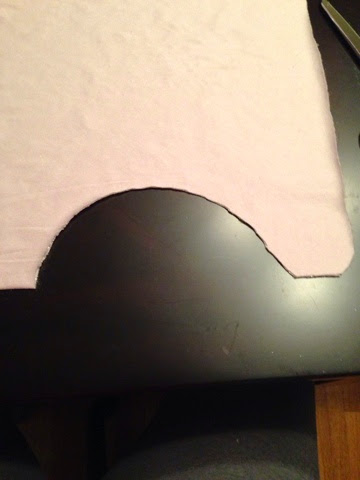
Cut the fold just at the neck strap.
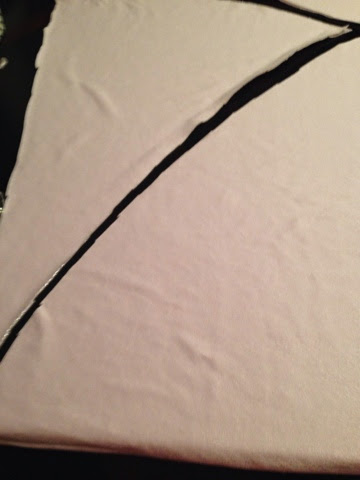
Step 3: starting up by the neck straps cut down to the bottom of the fabric or length you measured making a nice curve as you cut.

Crappy picture really. The original post has better pictures of this.
I thought this would be all I needed since I wasn't adding a long train to the cape but decided to curve the bottom as well because it looked funny otherwise making a U shape at the bottom.
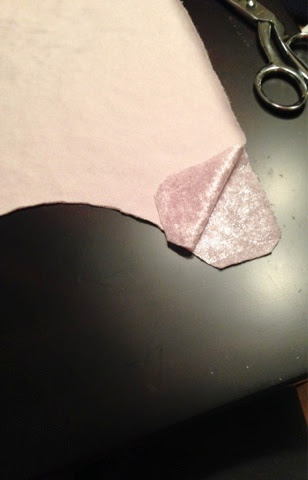
Step 4: starting from the bottom corner cut up towards the top about 1/4 of the way making sure to curve in a slope as you cut.
Basically this rounds out the bottom of the cape.
Step 5: I wasn't sure this material would hold up to a flame as in the original post so I finished off the edges by stitching all the way around with a zig zag stitch.
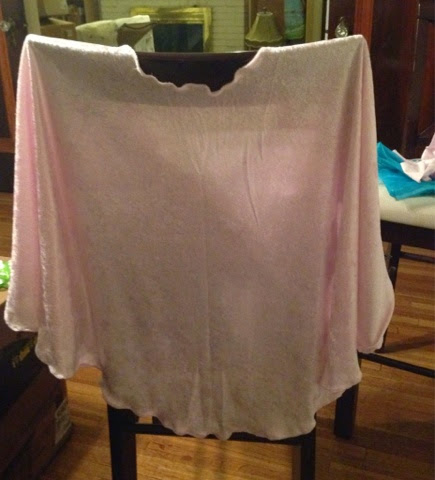

Unfortunately it didn't come out as long as I wanted because I didn't get enough fabric, but otherwise it looks great. Now I just need to stitch in some Velcro or a snap for the neck closure.
Hope the capes are as big of a hit as the rest of their costumes. Wish me luck.
Thursday, October 16, 2014
You Scream, I Scream, We All Scream for Icecream

I remember when I was little my great grandma was the most amazing cook. Everything was fried and covered in gravy, but I absolutely loved it. She always had a treat for dessert too, like jello or cake or the most amazing cookies. It took me forever to duplicate her cookies and honestly mine still aren't quite as good as hers.

When she died I wanted something to remember her by so I took her Ice cream scoop. I know sounds weird right? But her ice cream scoop was really cool. It is almost like a metal spatula but a little rounder. It's perfect for scooping out ice cream even when it gets really hard. Which it almost always does. I tell you I really feel for those guys at Baskin Robbins having to scoop out really hard ice cream all day. I bet they just end up with carpal tunnel.
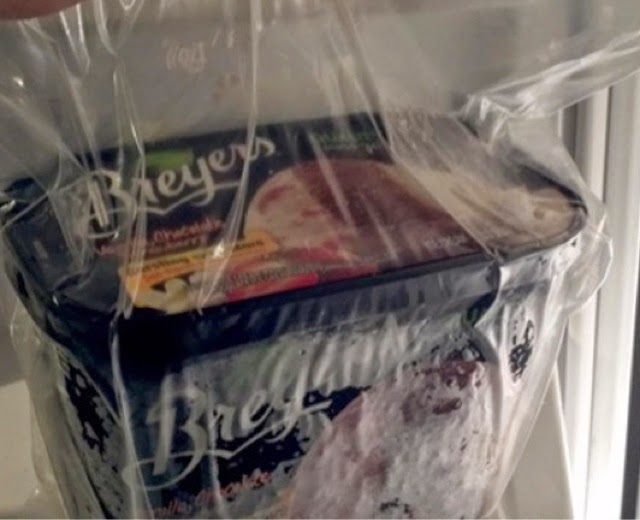
While I have always used grandma's scoop, I came across a pin that appears to have solved the hard ice cream problem in another way, by not letting it get hard at all. It seemed really easy so I thought I would try it out tonight. You simply put the ice cream container in a sealed Ziploc bag and voila your ice cream stays soft.
So I popped mine in a baggy, sealed it up and put it back in the freezer. I'll let you know how it goes tomorrow. Wish me luck.
Tuesday, October 14, 2014
Medusa Makeup

I was never one for wearing makeup despite the great big red birthmark on my forehead. Never really felt the need to conceal anything about my looks so I never learned to apply makeup.


I'm thinking that skill would have come in handy right about now when I want to do a little makeup effect for my Halloween costume this year. I could go as a ninja as Butterfly and I planned but unfortunately I have to work at the casino that night and cannot conceal my identity with a ninja mask, no matter how awesome it might be. That left me with no time to figure out a cheap and easy costume.
I had relegated myself to no costume at all this year when I hit upon a wonderful and cool tutorial for snake lips. This, naturally, morphed into being Medusa. Luckily for me the very same girl also made a tutorial for a super cool Medusa makeup look. Bingo. I set about gathering supplies at the dollar store. $20 later I had makeup galore, nail polish and dozens of snakes to put in my hair.
I decided to practice tonight and try out the tutorial for the eye and lip makeup. Again this was my first time applying makeup EVER so it didn't come out anywhere near what I wanted.
Makeup for Medusa
Snake lips
You will need netting or lace of some kind, a fluffy makeup brush and lipstick. The girl in the original tutorial utilized a few other items but I wanted to keep it simple.
Step 1: place netting over the lips. Note I used fish net stalkings as I had seen this in another tutorial but it didn't work very well. The netting needs to be non-stretchy material to get the right effect.
Step 2: using your makeup brush apply lipstick over the netting. Once you peel off the netting you will be left with super cool snake lips.
I first outlined my lips with a sparkly green lip liner .
Then applied black lipstick to the inner lip followed by green lipstick to the outer lip.
It all just got blended together unfortunately. My technique definitely needs work. Here is how the whole thing turned out with the eye makeup.
Here is how it should have looked.
I plan to keep working at it. Wish me luck.
Monday, October 13, 2014
Philly Cheesesteak
I troll through my pins as we watch reruns of Ninja Warrior looking for something to do for the day. I'm thinking something easy, in the crock pot for lunch tomorrow. I settle on potato soup because it just sounds yummy, but hubby vetoes it and says, "pick something that sounds good." So I begin naming off all the recipes in my crock pot board, none of which jump out to him. Then I notice one that is from a blog where the woman cooked something in the crock pot everyday for one year without repeating any recipes. I figure if I'm to find something that suits hubby it will have to be in there.
Reading down the list he, gag, settles on Philly Cheese steak. While I was going to actually eat the potato soup, I won't touch Philly Cheese steak. I haven't cooked much lately though so I go ahead and whip it up for him.
How to make crock pot style Philly Cheese steak. Just in case you're interested, you can find a link to her blog here.
Ingredients
1/2 an onion, sliced
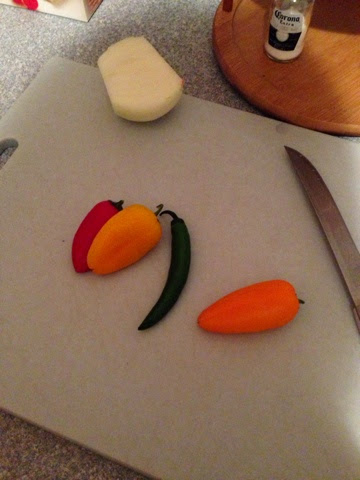
bell pepper, sliced
1 pound tri tip steak, sliced
1/4 C white wine
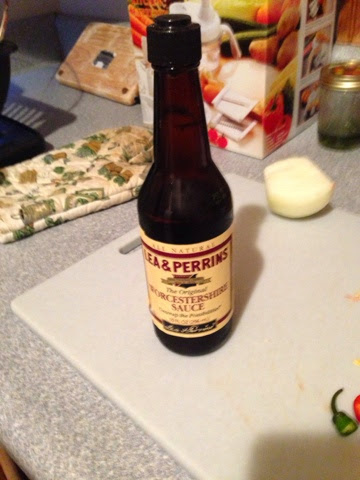
1 Tbsp Worcestershire (hardest word to spell ever) Sauce
Reading down the list he, gag, settles on Philly Cheese steak. While I was going to actually eat the potato soup, I won't touch Philly Cheese steak. I haven't cooked much lately though so I go ahead and whip it up for him.
How to make crock pot style Philly Cheese steak. Just in case you're interested, you can find a link to her blog here.
Ingredients
1/2 an onion, sliced
bell pepper, sliced
1 pound tri tip steak, sliced
1/4 C white wine
1 Tbsp Worcestershire (hardest word to spell ever) Sauce

Step 1: Prepare the ingredients and pour into crock pot.

Step 2: Cook on low 8-10 hours.

Well that was easy. I'll ask hubby how it tastes tomorrow and let you know how it went. Until next time. Hope tomorrows post will be that easy. Wish me luck.
Saturday, October 11, 2014
How to Peel a Tomato

I pull out my paring knife and get to it, laboriously peeling little tiny strips off an inch at a time. After two tomatoes my fingers hurt and I'm frustrated to no end.
Time to get a little extra help on the matter.
How to peel a tomato quickly.
Step 1: boil a pot of water, score the tomatoes with an X on the bottom and drop into the pot letting them boil for 20-40 seconds.
Step 2: remove tomatoes and put in an ice bath for about 60 seconds.
Step 3: peel off loosened skin.
It's just that easy and it really does work. Saved a ton of time and heartache. Now if only I could get the hubby to eat tomatoes. Wish me luck.
Friday, October 10, 2014
10 Tips on Networking

Networking is hard if you don't know what you are doing and have no clear goals in mind. My first few attempts were shaky as I fumbled around in the dark. Then I went to a seminar specifically on how to network where they told me, "everyone is here to network, you are not butting into any conversation you are introducing yourself to others who are there specifically to meet you." Wow what an eye opener. Now instead of feeling like an intruder I feel a little more comfortable insinuating myself into the circles of professionals standing around chatting.
I'm still new at this but I thought I'd share what I've learned so far.
10 tips on how to network to your best advantage.
#1
You are not an intruder, everyone who is at a networking event wants to talk to you.

#2
Have a clear goal in mind as to what you wish to get out of the session. Think big. So for example, if I wish to build my acupuncture practice I should strive to meet other health care professionals that I could set up as referral sources or schedule lunches with to discuss how I can help them help their patients. As opposed to randomly talking to everyone in the hopes that they might come and get a treatment from me.
#3
Search for contacts that can help with the business aspects of your practice, i.e. A commercial real estate agent to help me find a space for lease or a social marketing guru to help me with my hopeless ineptitude when it comes to technology.
#4
Ask what you can do to help others. Keep in mind the connections you make with people and send business their way or help them out with a problem. It will be returned to you times three.
#5
DO NOT try and sell. The goal is to socialize and make lasting connections not sell your product or service. The time for that will come, but ease into it as the conversation allows.
Nobody likes this guy.

#6
Treat your business cards like a prized commodity. Just relax and socialize, if they want your card they will ask for it. Forcing your card on someone leads to tons of your business cards ending up in the trash can. The same should be said of asking for business cards. If you don't think you need theirs then don't ask for it. The goal is to collect ones you may need in the future.

#7
Bring a pen. Jot down notes on the business cards you do take to help you remember the conversation later. You may also want to write down any information about the contact that will be helpful in the future.
#8
Be professional at all times. This means looking professional as well as acting professional. If you are anything like me you hate wearing formal clothes or even business casual. Suck it up, I had to go buy some suit jackets to look nice while staying warm and you should too. On the same note, act professional as well. Stay sober at the events and treat everyone with respect. You never know who they may know.

#9
No need to be picky, talk to random people as well as those you've hand picked. Looking at the registry of attendees is a great idea to make sure you meet certain contacts, but be aware that you never know who is going to give your business that lift it needs. It isn't always who you think it's going to be. Follow up on leads by sending a card or email.
#10
Last but not least. Be yourself. If you are insincere they will know or find out later which could hurt you in the long run.
Made a bunch of helpful contacts at the Big O! Show this week. Going to start following up tomorrow. Wish me luck.
Wednesday, October 8, 2014
A Good Time
Hopped over to Nobbies today with the girls to pick up some supplies. The idea was to make some Pom Pom (aka marshmallow) shooters. We grabbed some Solo cups and balloons and some silly string while we were at it. Okay so you don't really need silly string but it sure made for a fun half hour in the park chasing each other.


After returning home I set about making up the Pom Pom shooters only to realize that our balloons weren't big enough to fit over the cup. So much for that idea. So we improvised instead and decided to toss Pom poms into cups instead.
We started off by placing one cup a certain distance from us and alternating who would throw. Each sized Pom Pom was given a different point value.
Monkey girl pulled up from behind to take the lead in that game by sinking a ten pointer.
Next up we decided to up the stakes and offer three cups to shoot at at different distances. Butterfly stole the show with that one by sinking eight balls in the closest cup. Smart girl.
It was a stiff competition and I'm sure it would have broken out into an all out free for all Pom Pom fight, but sis arrived home just in time and it was off to bed for the girls.
I'm looking forward to many more days of fun with my beautiful nieces while it's still cool to hang out with me. Wish me luck.
Tuesday, October 7, 2014
What to do with Left Over Broth
A wonderful savory scent hits my nostrils as I walk in the door. I had started a roast earlier in the day and left it in the crock pot to cook leaving the most amazing smell wafting throughout the house.
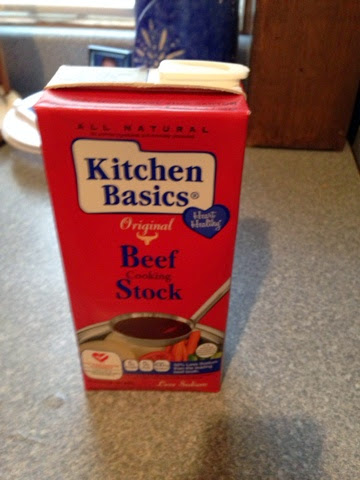
The smell of the roast brings to mind the beef broth I used as a base in the crock pot instead of water. I usually buy a big container of broth but only end up using about a cup or so before the rest goes bad. The problem is that I hardly ever use a broth or just not enough to warrant getting a big container of it.
This time I was determined to preserve the left over broth for future use. I have seen many times on Pinterest how people use ice cube trays to preserve herbs or sauces and I thought I would utilize this method to store the beef broth I had left.
All you need to do is pour the leftover broth into the ice cube trays and stick them in the freezer. After they are frozen you can crack them out and put into a bag to save on space.

Well there you have it folks. Neatly contained broth ready to go for future use. I'm going to try to find more ways to use broth for cooking. Wish me luck.
Sunday, October 5, 2014
I'm an Awesome Sister

Being sick is no fun, but it's even less fun when you have the stomach flu. Thankfully I'm not the one with the stomach flu (knock on wood), but unfortunately my sister is uber sick complete with sudden turmoil disorder in TCM lingo (i.e. vomiting and diarrhea, TMI I know, sorry). I felt really bad and helped her out as much as I could. Later that afternoon I was really hungry so we ordered pizza for lunch, which of course my sister couldn't eat, she could barely hold down water. So of course I felt awful eating in front of her when I know she is hungry but can't hold down food. Honestly I think she really needed to drink some warm broth or soup, but she is incredibly picky about what she eats. The only soup she really eats is Anderson's Split Pea Soup.
If that is the only soup she eats, then that was what I was determined to get for her. I searched two different stores top to bottom, but alas couldn't find any. I guess they just don't carry it in Nebraska so I came up empty handed and disappointed her again. :(
Never fear, I decided I would go one step further and just make the stuff myself. ;)
So here it is Split Pea Soup, Anderson's Style
Step 1: Gather your ingredients
8C Water
2 C green split peas
1 rib of celery, coarsely chopped
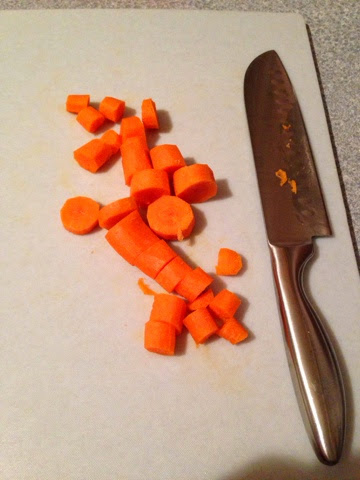
1 large carrot, chopped
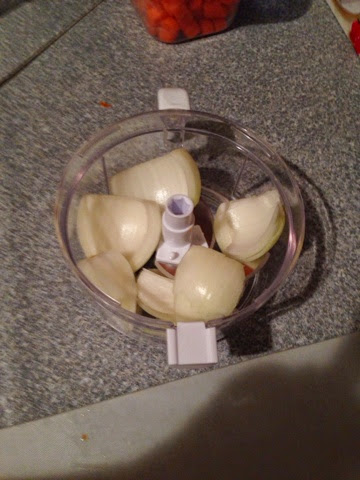
1 small onion, chopped
1/4 tsp thyme
1 dash of ground red pepper
1 bay leaf
salt and pepper to taste
Here I am chopping up my carrots, yummy. Hopefully Monkey still tries it even though she hates carrots.
And here I am chopping my celery. BTW if you were also wondering what exactly a rib of celery is, it is one stalk or piece of celery.

Here I am chopping my onion in two seconds with my handy dandy new chopper that my lovely family got for my birthday. I love it. I just peeled it, cut it in half and broke it into a few pieces, threw it in and with only a few turns of the lid had the onion chopped up in no time.

Step 2: Note: the original recipe says to add everything to a saucepan and boil vigorously for 20 minutes, then reduce heat, cover and simmer until the peas are tender. As I started this later in the evening, I decided to just throw it all in the crock pot instead.
Add the water to the crockpot, then add in your veggies.

Pour in the split peas. I found out that 2 C is equal to a 1 pound bag.

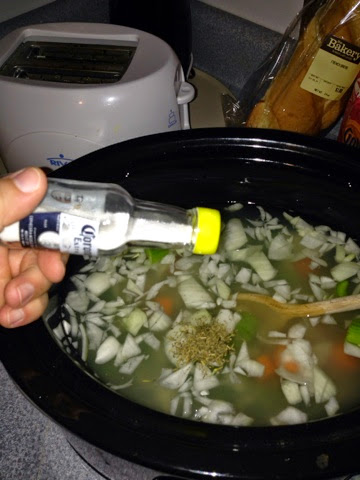
Then add your spices.
Thyme

Salt and pepper and cayenne (crushed red pepper). I left the last part out and added extra salt instead since I know my sister hates pepper and cayenne, but loves salt. In fact, I think I am the only one in my family who can't stand salt. Or butter.
Step 3: Cook in the crock pot on low until the peas are tender, about 6-8hrs. Once don't pour through a fine sieve and either blend or crush some of the peas to make the soup smoother.
There you have it folks. I set my crock pot to low and am letting it cook tonight while I sleep. Hopefully it turns out just like Anderson's split pea soup. We will find out in the morning. Wish me luck.
Yoga Your Way to a Better You
Alright ladies time once again to try out another workout to tone up those flabby arms. Since the last one I tried was so short, this time I thought I would go for a little longer workout. And bonus this one uses your own bodyweight so you won't need any special equipment like the fancy food cans I used in the last one (shh don't tell anyone).
I was never much for yoga I always preferred pilates, but I'm always willing to give it another go.
So here it is: 10 Yoga Moves to Stretch Your Way to Slim and Sexy
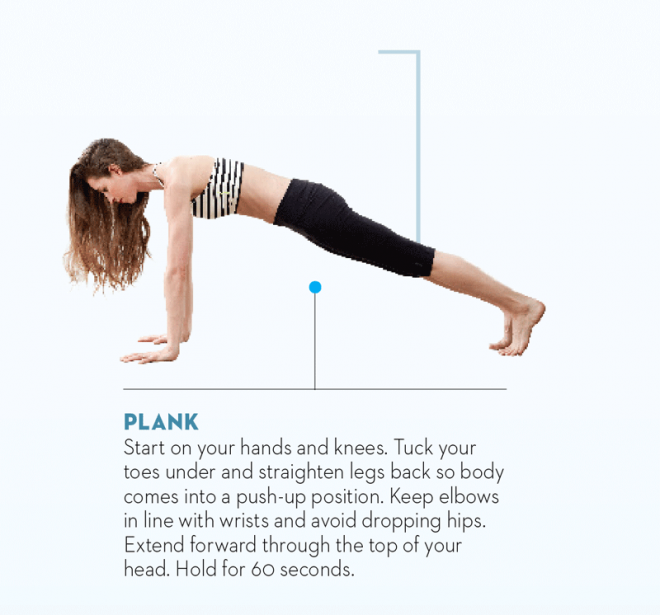
This one was easy, in fact I've been doing them regularly to help with core strength. It is also great for the arms too.
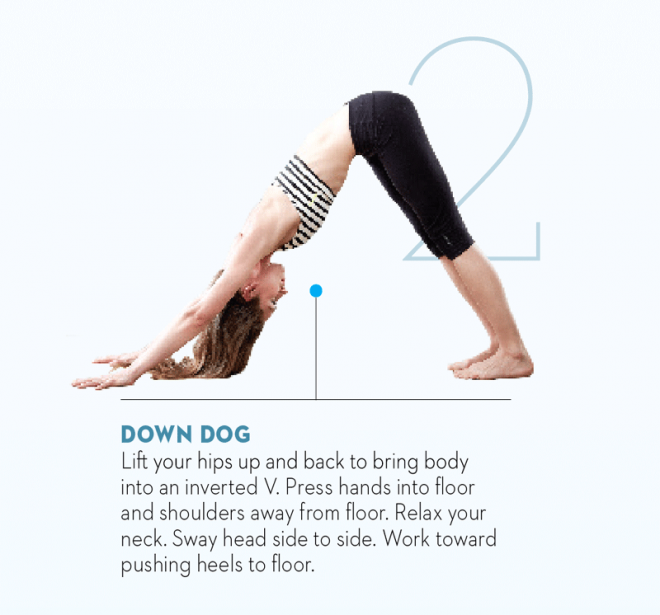
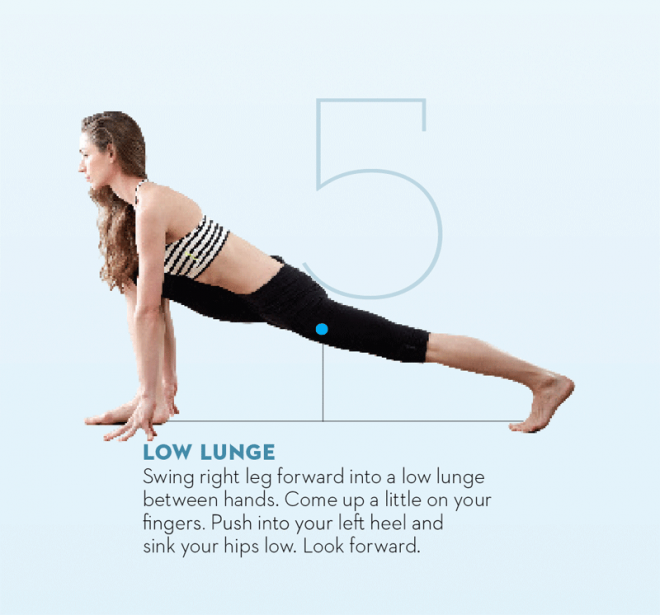
Next up, downward dog. I actually always loved this move. Feels good on my hamstrings.
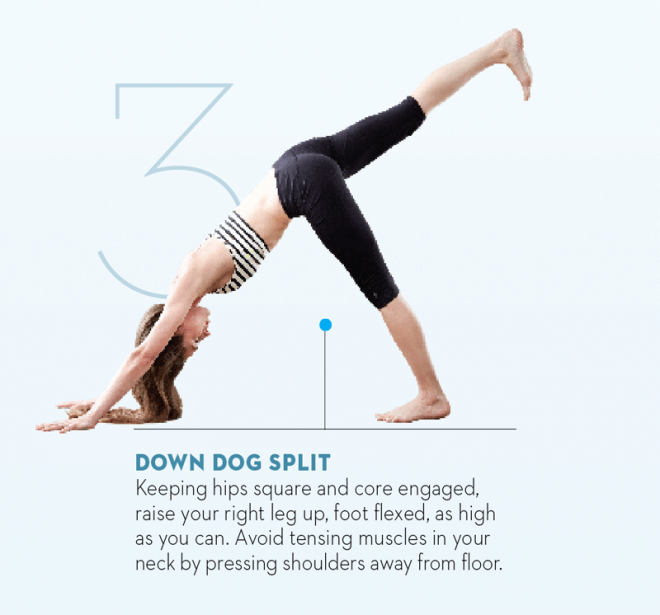
Not as easy as it looks. I did my best, but there was no way I was getting my leg up that high.
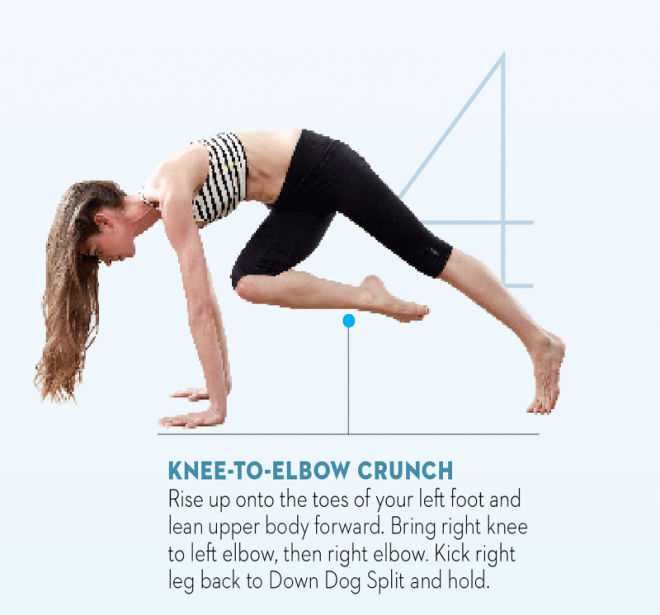
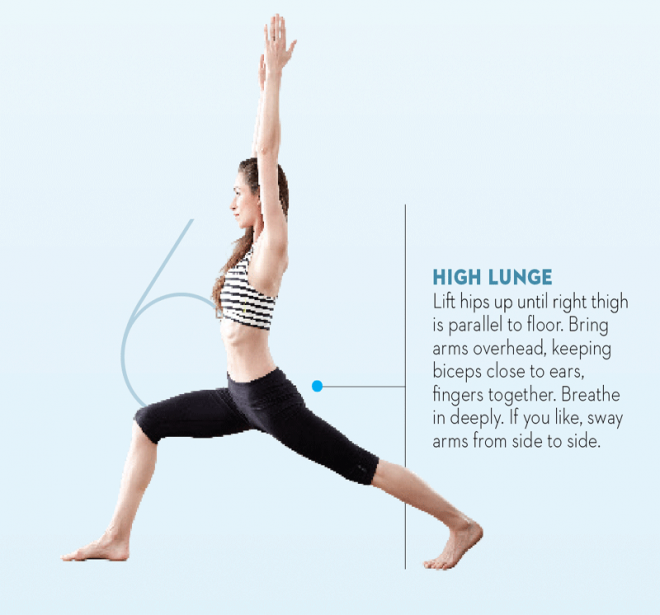
This move was also a little hard for me. As a modification I first went back into downward dog and then transitioned to this move.
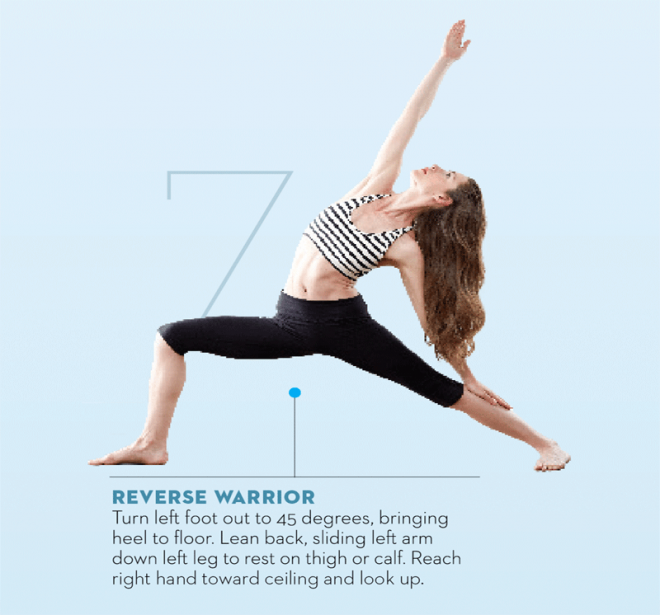
Again I can never quite get my leg into this position in one move. I usually get it as far forward as possible then scoot it up more afterward.
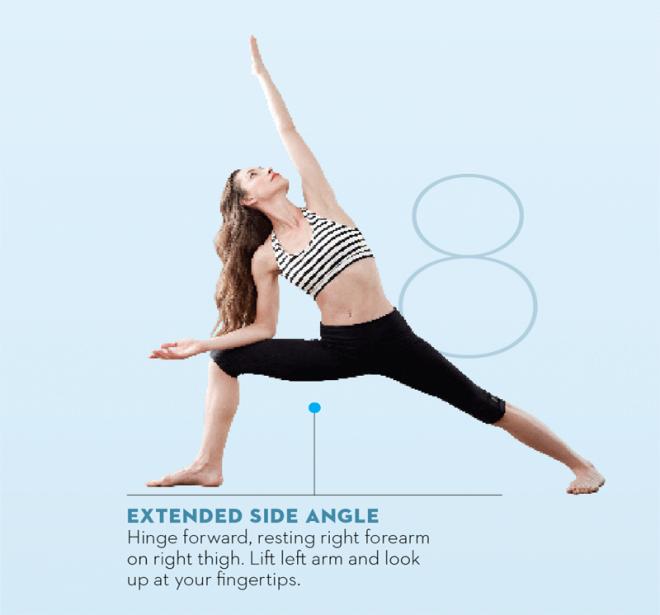
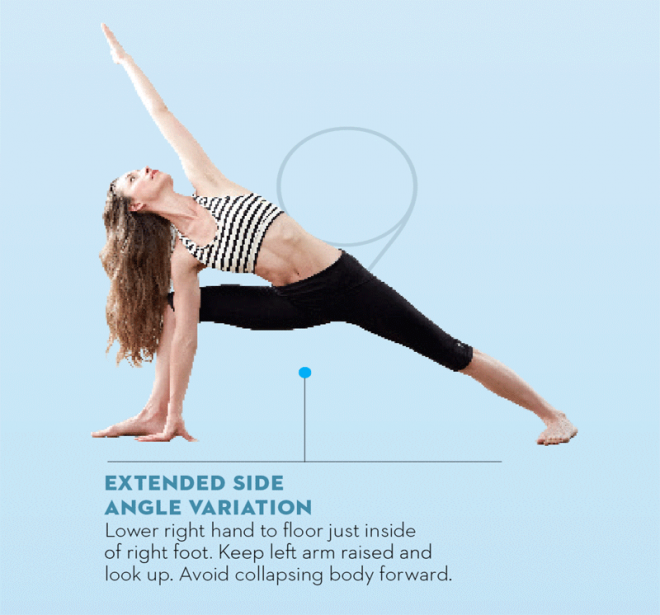
Try not to pull your adductors here. I know it sounds weird but I definitely think I pulled something on that one.
Again I didn't get quite that much extension. Please be smart and work within your range.
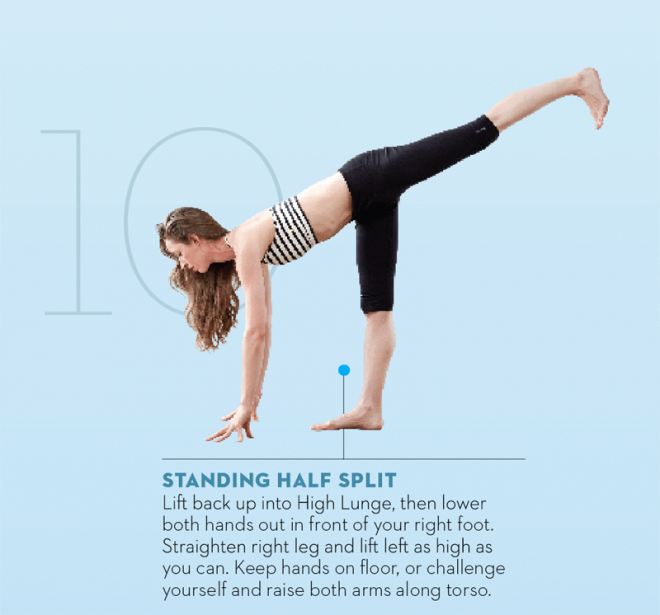
My hips were really tight.
I felt it best for me at this point not to go into this pose, I just held the last one a little longer.
Phew you've made it. Oh wait just kidding now you have to do it all over again on the other side. If you are still feeling spunky after that then do a whole other round on each side. Great routine for strengthening the core and arms, but unfortunately I still hate yoga. I gotta tell ya though I was wiped after once on each side. Maybe if I keep it up it will get easier. Wish me luck.
I was never much for yoga I always preferred pilates, but I'm always willing to give it another go.
So here it is: 10 Yoga Moves to Stretch Your Way to Slim and Sexy
This one was easy, in fact I've been doing them regularly to help with core strength. It is also great for the arms too.
Next up, downward dog. I actually always loved this move. Feels good on my hamstrings.
Not as easy as it looks. I did my best, but there was no way I was getting my leg up that high.
This move was also a little hard for me. As a modification I first went back into downward dog and then transitioned to this move.
Again I can never quite get my leg into this position in one move. I usually get it as far forward as possible then scoot it up more afterward.
Try not to pull your adductors here. I know it sounds weird but I definitely think I pulled something on that one.
Again I didn't get quite that much extension. Please be smart and work within your range.
My hips were really tight.
I felt it best for me at this point not to go into this pose, I just held the last one a little longer.
Phew you've made it. Oh wait just kidding now you have to do it all over again on the other side. If you are still feeling spunky after that then do a whole other round on each side. Great routine for strengthening the core and arms, but unfortunately I still hate yoga. I gotta tell ya though I was wiped after once on each side. Maybe if I keep it up it will get easier. Wish me luck.
Subscribe to:
Posts (Atom)