Tuesday, September 30, 2014

How to Build Core Strength


Some people get claustrophobic in elevators, I get claustrophobic in shoes.  As a child I was one of those wild jungle kids that ran around bare foot climbing trees.  My feet were calloused and hard because my parents could never keep shoes on me.  Even now I mostly wear sandals because I absolutely hate to wear shoes.  

Growing up in sunny California I was able to get away with a pair of sandals, but once I moved to the midwest I was forced to buy a pair of tennis shoes to outlast the winter months.  This past winter as I bent down to tie my shoes I realized that I am now too heavy to bend over and tie my shoes.  The more I thought about it, the more I realized how much my weight affected me.  Pain under my ribs from my bra being too tight, pants too short because I'm growing too big for them and a dozen other things I don't wish to recount for an audience.  

Not being able to tie my shoes was the last straw, the hump that broke the camel's back so to speak.  It was time to do something about my weight, but what could I do?  All the exercises I loved to do before my back injury just flared up my condition, part of the reason I gained all this weight in the first place.  There had to be another way.  

I needed a way to strengthen my core, without doing sit ups (they only make it worse), in order to support my back.  As a last ditch effort to do something I started doing push ups to work out my upper body and inadvertently stumbled upon a way to improve my core strength.  I now do push ups and plank type excercises everyday to improve core strength which is doing wonders to help support my back.  

After reading my post yesterday my mom tried to take my advice and do some push ups herself, but found that she couldn't quite do one.  I'll let you in on a little secret, at first I couldn't do a push up either, not even on my knees.  So today I thought I would detail exactly how to go about building up your core and arm strength so that eventually you too can do real push ups.

How to Build up to a Bona Fide Push Up

Step 1:  Start simple.  You probably won't have enough arm or core strength yet to do real push ups.  Instead you need to build muscle first.  Start off by doing push ups against a wall as pictured below.  Form is everything, keep your back straight at all times, bending at the arms.


Keep in mind that the closer you are to the wall or the wider your arms are, the easier it will be.  

Start off by doing as many of these as you can a day.  When you get up to 20-30 then move on to step 2.

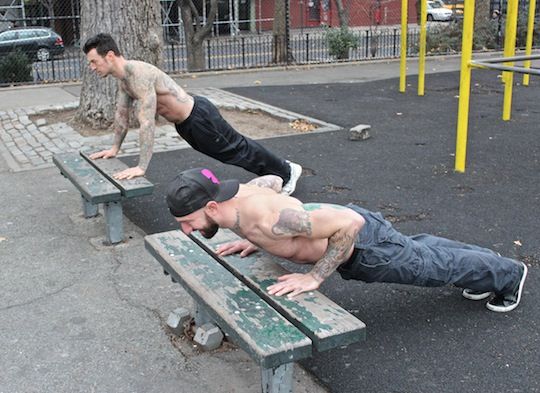
Step 2:  Begin doing your push ups on an incline like a stair or bench or if you can on your knees on the floor.  Again make sure you are keeping correct form.  If you are too shaky to keep the back straight, butt down then you are not strong enough to do these right now and will need to do some planks or go back to step 1.


Work up to doing 20-30 in these postitions as well.  You may also start adding in a plank for core strength if you feel you are having a hard time keeping your back straight.


Step 3:  As you get stronger and feel more comfortable it is time to go to a full plank and real push ups.


Once you can easily hold a plank for 60 seconds and do 20-30 push ups at a time you can do more advanced exercises if you wish.

Step 4:  Get crazy.  Add leg lifts while doing the plank.  Or better yet work the obliques by turning to the side.


You can also vary your push ups by adjusting the arm width.  Wider is easier, closer together is harder.  Or you can even add a clap inbetween.  

While I can at this point do regular push ups and planks, I still prefer to stay at step 2 as I can't comfortably do 20-30 at a time on my knees.  It does take hard work and dedication, you will need to do it every day several times a day if possible to really build up your strength.  I still have a long way to go myself.  Wish me luck.

Sunday, September 28, 2014

How to Manage Pain


I was supposed to do a pin yesterday, but I just couldn't.  Instead I woke up with that all too familiar twinge of pain that makes me gasp and just about drop to the floor as my leg buckles underneath me upon standing.  Not sure what led to the flare up this time, I try to remain positive and go about my day, but it's just not working.  By the end of the day I've managed to get nothing done, couldn't work out, in fact I could barely walk.  My gait was more like a staggering shuffle accompanied by a chorus of gasps and groans.  What I hate about being in so much pain isn't so much not being able to do everyday activities, or even the fact that I can no longer do the things I love, I've become accustomed to that.  The thing I hate most about it is all the stares and looks I get and the fact that I have had to rely on someone else to take care of me at times.  I was doing so good recently, I don't want to go back to where I was before.  I just can't handle that.

Living with chronic pain is hard and there are others out there that know what I'm talking about when I say, "it's easy to become so consumed with the pain that you forget how to live."  Struggling just to make it through each day, believing that you have to accustom yourself to living with the pain or never doing those things you love to do.  It's wrong, just wrong.  We can find ways to manage the pain or even fight it off so that we can get back to living life as it should be.  It's not an easy road or a simple answer and kind of like rehab you have to admit you have a problem and want to fix it.


It sounds stupid, I know.  I mean who actually wants to live in pain?  No one.  It all comes down to that part where you get accustomed to the pain and because you thing you have tried everything, you think that this is the way it has to be so you stop trying, stop believing that you can live.  I'm not saying you will live completely pain free every day because you won't.  There will be flare-ups just like the one I am having now, but they will be less intense, shorter in duration and less frequent.

While I let the depression and pain get to me yesterday, I worked today on getting better by fighting the pain and I'm ready now to let you all in on how I manage my pain so that after almost two years of debilitating pain and a lifetime of chronic pain I was able to go three months with no pain at all.  I even started working out again and started bowling, something I never though I'd be able to do again.

How to Manage Chronic Pain


Step 1:  Have a good cry, get it all out.  Cry and scream out all the misery and pain.  Just don't give up.  Never surrender to the pain, the second you do it's all over.

Your pain is like your children, you have to set boundarys or they will walk all over you.


Step 2:  After several years of living with chronic pain you will think that you have tried everything to rid yourself of the pain, but just trust me, you haven't.  There is always another practitioner or doctor, chiropractor, massage therapist, acupuncturist, etc.  They are not all created equal, some practitioners are better than others.  Keep trying until you find one that resonates with you, helps you and then stick with it.

Your pain will always be there lurking in the background and just when you least expect it it will pop out and trip you up.  When this happens refer to step 1, then go see your practitioner for help.

As a practioner myself, I know how to fix other people's pain, probably because I've experienced so much myself, but when it comes to my own pain I always seem to make it worse.  When you are in that much pain all the time it messes with your mind and drives you crazy, making it hard to concentrate on the right thing to do for yourself.  At these times I find it better to let someone else help me out of the hole.  Then when I am feeling better, I take it upon myself, as should you, to continue self stretching, massage, and strengthening of my muscles to prevent future attacks.  If you don't know what to do ask your practioner for a regimen of self-care to do at home.


Step 3:  Never stop moving, stay active.  No matter how much it hurts, it will always get worse the second you stop moving.  Please utilize some common sense here.  Obviously if you are having a flare up take some time to recuperate.  Also don't over do it.  Stay active within reason.  The point here is to keep up some level of activity, not plop down and spend the rest of your life in a chair or scooter.

Lack of movement causes the muscles and tissues to seize up and/ or atrophy leading to more pain.  This will also lead to buildup of blood and fluids in the lower body, i.e. pitting edema in the feet or restless leg syndrome just to name a few.


Step 4:  Start a regimen of exercise to build strength

With a few bulging discs in my lower back I was having trouble walking.  With the use of acupuncture and massage I finally got to the point where I could walk without a cane or crutches with minimal pain throughout the day and some pain at night.  I became frustrated that every time I tried to workout as I had before my injury, it flared up my symptoms.  Therefore, I decided that I needed to change the way I excercised to avoid future flare ups.  If I couldn't work out my hips and back, I would then do only upper body workouts for now.

I started doing push ups and planks.  That's it.  Low and behold within two weeks I was able to sleep through the night without pain and had absolutely no pain during the day.  Amazing.  Next thing you know I'm at the gym doing cardio and free weights.  The thing about the push ups and planks was that it increased my core strength without harming my lower back as sit ups would have done.

Find what works for you and keep it up.


Step 5:  Last and final word of advice.  Once you figure out how to rid yourself and your life of pain and the depression that comes with giving up, live every day like it was your last.  Never take for granted the small things and enjoy those pain free moments.  Be patient with others that may be in as much pain as you once were and help those that need some support.


That's all I have for today.  I would like to say that I am all better now and living pain free once again, but that would be a lie.  The difference today is I know that I can be better it will just take time and a few good treatments.  On that note, I had my husband help me massage and do acupuncture on myself last night so that I can walk better today.  I also set up an appointment this week to get an acupuncture and massage treatment from people I trust.  I'm already walking better and in less pain.  By the end of the week I expect to be back to the gym and up for any activity I choose.  Okay maybe not every activity, but I'm working on it.  Wish me luck.


Saturday, September 27, 2014

Bites of Gooey Goodness

Getting home late I rummage through the fridge looking for something quick to eat.  I could make a sandwich, but I just had one for lunch yesterday.  I push the sour cream to the side and notice the left over burrito meat in the back of the fridge.  That sounds good.  I pull out the tupper and grab a couple slices of American cheese out of the bin.  Heading over to the cupboard I open it up and reach inside for the tortillas and realize with a pang of regret that we used the last ones yesterday.  Sighing heavily I open up the fridge again to look for something else, but nothing jumps out to catch my taste buds.  I don't really feel up to making something new, I just wanted a quick snack so I start thinking of ways to use the left over burrito meat.  Lazy tacos sounds great, but again I lack the necessary ingredient, Doritos this time.  

After a few minutes of blank staring I decide to enlist the help of my friends on Pinterest.  Just a few seconds is all it takes to land on a pin for mini mexican pizzas.  Sounds delish.  

How to make mini mexican pizzas

Step 1:  The original recipe used tortillas for this part, but as I said earlier, I didn't have any.  So I imporvised and whipped out a can of Pillsbury crescent rolls.  Use a cup or small bowl to cut circles out of your tortillas or dough.


Step 2:  Place circles of dough into a muffin tin.


Step 3:  Fill the circles of dough with desired ingredients.  I first filled mine with the American cheese slices so that there would be a cheesy gooey bottom.  


Then I layered on the left over burrito meat.  You could also make it up fresh and just add the seasoned meat as in the original post,  but I think that would take longer to cook.  My husband doesn't like beans so I just added some refried beans to a few of the bites for me.


Step 4:  Bake in the oven at 375 degrees for 10-12 minutes or until the crust is golden brown.  Let cool for several minutes then use a fork to pull out the bites and serve with any extras you'd like.  I just added sour cream and my honey ate them as is.

They were so good we finished them up within a few minutes.  This will definitely be on the menu again.  In the future I may even wrap the dough up and over the meat to make a little pocket of goodness.  Wish me luck.


Thursday, September 25, 2014

Frozen bananas

Most women when walking through the mall get excited about shopping for shoes or clothes.  All the flashy items calling to them from the store front windows.  Me on the other hand couldn't care less about a pair of heels or the latest Coach bag.  What calls to me every time I enter a mall is the thought of getting a frozen banana.  I don't really even like chocolate (I know, I know who doesn't like chocolate) I just love the taste of a frozen banana.  There must be some sort of magic that happens when you freeze a banana that just makes it taste better. 

I often buy banans at the store because I love them so much, but they go bad too fast to get more than two or three at a time.  Which isn't a bad thing because you can make banana bread out of the over ripe ones.  Making bread takes time, however, which I don't always have.  Not to mention the fact that hubby gets grossed out by the look of over ripe bananas.  He has this weird paranoia about food going bad.  I digress, the point is I needed something to do with all the extra bananas that would otherwise go bad if I don't use them.  

Therefore I had the brilliant idea after the last trip to the mall to make my very own frozen bananas.  The kind that only cost 50 cents a pound instead of four dollars a banana.  I didn't look up any pins just decided to wing it this time.  I mean how hard could it be to freeze a banana?

How to Make Frozen Bananas

Step 1:  Peel the bananas and either slice them into pieces for future smoothies or keep them whole to dip in chocolate or eat plain.


Step 2:  Place the slices and/or whole bananas on a flat cookie or baking sheet making sure to have a small space in between each one.  From what I have gleaned you need to freeze the fruit like this first so that they don't stick together or get freezer burn.


Step 3:  Place a piece of press and seal over the backing sheet.


Step 4:  Place baking sheet in the freezer until frozen.  Once frozen you can transfer the pieces into Ziplocs.  Or just eat them. 


The process worked great!  I now have several frozen bananas and little frozen pieces for smoothies.  They taste great too and kept my bananas from going bad.  I love this.  I ate two whole bananas today in fact, couldn't help myself.  Next stop?  Dipping them in chocolate for the hubby.  Wish me luck.

Wednesday, September 24, 2014

How to Change a Sink Faucet


While visiting my dad this week he casually mentioned that he couldn't use his kitchen sink anymore because it leaked and his bathroom faucet was also leaking from the hot water handle.  Ten to twenty years ago he would have fixed them himself in a heartbeat, but now he is disabled and has a hard time getting around much less crawling under sinks to change faucets.  And so he resigned himself to the fact that unless he spent a ton of money on a plumber, he would just have to go to the upstairs bathroom every time he wanted to wash his hands or get water.  This just seemed unacceptable to me and being the new hanywoman I've become I decided this was something I could do for him myself.

He had the know how and I had the hands so we set to it.

First things first we needed to remove the old faucet.  This turned out to be harder than it seemed as things were pretty stuck on from all the water deposits and rust.

Step 1:  Shut off the water to the sink by turning off the valves, usually located below the sink itself.


Step 2:  Unscrew the water hoses from the bottom of the faucet.  I ended up using a crescent wrench to get it off and believe me it was ultra hard because the handle on the wrench was much to long to use in such a tiny little space.  Much grunting and fowl language later I had the hoses removed.


Step 3:  Unscrew the bolts holding the faucet on (underneath the sink).  For me there was one on each side of the faucet.  These took me the longest to remove because they were corroded on and instead of being a bolt were some weird butterfly plastic thingy (not actual name of part) that was hard to grip with any tool.  Shortly after my dad gave up on me actually being able to do this I finally got those buggers loosened up and removed.  After that it was simple enough to pull the faucet up and out.


Step 4:  Go to your local hardware store and pick out a lovely faucet.  Then follow the instructions on how to install.  Ha ha j/k, if they were anything like mine that is easier said than done.  I've noticed as I do these things that the instructions leave a little to be desired.

Step 5:  To install the new faucet, remove from package and set into the hole in the sink.  Then screw on the funky butterfly plastic thingys (much easier than removing them) and rehook up the water hoses.  You can then optionally use some sealant to seal the faucet to the sink.  This is good to do if your sink isn't level to keep water from leaking through underneath the sink.


That's it you are all done.  That didn't take long at all did it?  I tell you what, it was much easier than installing the bathroom fixtures.  That one gave me a headache and took me three times as long.

Hopefully I don't have to change any fixtures for a few weeks.  Wish me luck.

Monday, September 22, 2014

How to Survive a Plane Flight


The day of my flight comes and my stomach instantly knots up as the nausea hits me full force. It's not so much a fear of flying, more the irritation and boredom of going through all those hoops to get in the boarding area, then waiting for an hour surrounded by people you don't know and finally being folded up like a pretzel in an uncomfortable chair with nothing to do and nowhere to go. 


I've learned over the years of horrible flights that first class is the way to go. But for those of us that can't afford the luxury of an extra large reclining chair replete with fuzzy socks and champagne the only solution is to prepare yourself in advance. While this won't make the flight exactly enjoyable what with crying babies and kicks to the back of the chair it will at least allow you to be as comfortable as possible. 

Tips to Surviving a Plane Flight

#1 The day before

A) The preparation process really starts the night before your flight. Be sure to check in and preprint your boarding pass. This will save you extra time come day of especially if you aren't checking baggage. 

B)  Be sure to pack your bags and anything else you might need the night or even a couple of days before departure. Save yourself a headache and pack beforehand so that you can relax the day of your flight knowing everything is in place. Besides, this gives you that extra time your brain needs to process that oh crud moment when you realize you forgot to pack a toothbrush. Oh and just trust me when I say, pack a tennis ball, unless of course you get a massage the day of. Never thought of that one before. I think I might need to do that from now on. Imagine strolling through the airport in a massage induced stupor and resting pleasantly until your flight then falling asleep on the plane. Hmmm food for thought. 


C) You will also want to set up transportation to and from the airport. Leaving your car at the airport is expensive so try to get someone to drop you off or look into shuttle services. If you are in an area with good public transportation, like when I lived in San Diego, you can even take a bus or train. Don't worry the bums won't hurt you they just want a nap. 

#2 Snacks

Eat light the day of your flight. All the commotion and stress of a flight can make that chili you ate feel like a hard rock in the pit if your stomach and the gas escaping from your bowels is going to make it tough on your neighbor. On second thought...that might be a good way to get yourself an open seat on either side. 


Pack some snacks to take with. Airports know they have a captive audience so they can charge through the roof for a bag of pretzels. Be smart and bring food from home. You may have to buy your water at the airport but you don't have to buy food there. Trust me, a microscopic bag of peanuts won't tide you over they just make you hungrier. 

#3 Carry On/Luggage

Pack your carry on. This will include your snacks, something to keep you entertained, a jacket or warm blanket (trust me it gets cold, you might even need the fuzzy socks), a small pillow if you intend to sleep and some small toiletries packed in 3 oz containers and sealed in a ziploc bag. Your carry on doesn't have to be ginormous, in fact it should be as small as possible. It sucks carting around a huge bag through the airport making your muscles scream. Then you have to try and find room on the plane in those tiny little overhead compartments. The lighter the better in my book. If you are going on vacation then just check your bag, the extra twenty minutes at baggage claim isn't going to hurt. If you are just going somewhere for a couple of days then you just need a small bag.  Save your back, pack light or check it. Exception of course to all those moms out there with their kids. I really feel for you. Good luck juggling all those bags, strollers and kids. May someone be nice and help you out. 

#4  Day Of

Get to the airport early. I know waiting at the airport is boring, but it is much better than getting there late, being rushed and having to cut in line like a jerk, always wondering am I gonna make my flight?


After arriving at the airport say your goodbyes and head up to the counter. Hopefully you preprinted your boarding pass and can hop in the short line to check your baggage or even better head straight to the gate if you have no luggage to check. Be prepared and have your ID and boarding pass or confirmation number at hand to facilitate check in. 

#5  Airport Security


Here's where proper footwear and Boy Scout preparedness comes in. Wear shoes that you can easily slip on and off because you know you will have to take them off. Unless you're like 100 or something. I think they give you a break then kinda like a senior discount. Also have your jacket off, keys and money all set to drop into a little bin. This is where traveling light really helps. When I get up to the front the last thing I want to do is stand behind someone who takes 20 minutes to load up a bin when I have all my stuff ready to go in ten seconds flat. Be a good neighbor, have your stuff ready to go. 

# 6 You've made it

Ahh breath a sigh of relief, the hard part is over. Next stop head to the bathroom. Trust me when I say you don't want to have to go on the plane. You wait patiently for that little light to go out then start heading for the restroom only to be intercepted by some guy closer. And of course you can't loiter there waiting or risk getting reprimanded by the stewardess. Then when you finally get your turn you have to fold yourself into a tiny little coat closet where you can pee and wash your hands all at the same time. Avoid this uncomfortable situation by going before you even get in the plane. 

After a quick pit stop go and buy the ten dollar bottle of water. I know the pocket book screams at this highway robbery, but you will need to stay hydrated on the plane. 

All set to go now you just have to wait for boarding and enjoy the ride.  By the time your back starts cramping from folding arms in to avoid touching the people on either side (I always seem to get stuck in the middle) it's time to whip out your tennis ball for some massage. Just plop that thing in between your back and the seat (it's definitely hard enough) and find some tender spots to hang out on. As you feel those knots melting away move on to another spot until finally you are relaxed enough to take a nap. 

That's my boarding call. Wish me luck. 

Sunday, September 21, 2014

How to Repair a Hole in the Couch


After yesterday's update on how my life has progressed since starting the blog, I got to thinking about all the pins I've done, some useful, some not.  Most of the pins I've done aren't very useful in the real world unless you want to craft something.  Say for instance the ladder stitch, not very useful unless you want to sew a pillow closed or make some stuffed animals.  And really, how many stuffed animals is someone really going to make?  Butterfly would probably jump in here to say that she will make a lot.  She actually just bought a pattern for making cute little stuffed animals.  I expect to start seeing them taking over my sister's house at any moment.


This got me thinking, though, about how to utilize my skills in new ways.  The first thing that came to mind was the gaping hole in my sister's couch.  One day I came over to visit and found a large sign that said, "DO NOT SIT HERE" placed upon the couch in the exact spot in which I normally sit.  Apparently the seam in the middle of the chair back had come apart and ripped quite a bit, creating a large hole through which the stuffing could be seen.  Ever since, several weeks now, no one has been able to sit on that part of the couch for fear of ripping the seams even more and creating a bigger hole.

Today I thought, I can fix that.  So we headed to Jo Ann's and picked up some heavy duty upholstery thread and some special needles to aid in stitching that seam back up.  The idea was simple, use a ladder stitch, something I had done before although not in a blog post, to sew up the hole without showing the seam. 

Just to refresh my memory, I went back and looked at a pin for a ladder stitch (link).  The process is very simple, just takes time, a lot in the case of sewing on leather it seems.  Doing it on upholstery, however, does require some special tools.  You will need some super whooptydoo furniture thread (thicker and sturdier) and a curved needle.


Step 1:  Thread your needle and tie a knot in one end. 


Step 2:  Anchor and knot your thread by pushing the needle through a part of the seam and pulling the thread through, leaving a small portion at the back that you don't thread all the way through.  Then push the needle through again leaving a loop through which you will pull the thread through, making your knot.  If this doesn't make any sense you can find instructions with pictures for this here.

Step 3:  Once you have a starting place, thread the needle through the fabric on one edge within your seam line, then thread again through the other edge of the fabric also within the seam line.  Continue on in this fashion creating a ladder effect with the stitches, hence the name.  After you have a few stitches you can then pull them tight, thereby pulling the edges of the fabric together and enclosing the stitches inside the seam line. 


Note:  As my sister's couch was made out of leather, I found out real quick that leather holds up well to wear and tear for a reason.  It's thick!  Trying to thread the needle through was killing my fingers.  I finally used some needle nose pliers to help me push the needle through the leather and pull it out the other side.  Even doing so my hands and fingers were killing me after just a few stitches and I had to trade off and on with my sister to get the job done.  


The work was harder than I thought it would be, but well worth the effort as we did a great job stitching up the hole.  I look forward to more applications in the future.  Until next time, same bat time, same bat channel.  See you tomorrow, wish me luck.


Friday, September 19, 2014

Update

I've been doing these posts for about a month now and I thought I would stop and take stock of what I have accomplished.  I originally started the blog It's a Good Morning for Pinterest to take charge of my life which had become stagnant and downright depressing.  My pins started off pretty small and I will admit, I had to bully myself into doing them.  Writing the blog made me hold myself accountable, however, so I continued doing them even though I didn't always want to.  The more and more I did the pins, however, I found that I liked doing them. 

My initial pins were just small things to get my feet off the ground, usually something that needed to be done around the house, like how to make the garbage disposal smell better, or things to do with my nieces, making frozen strawberry lemonade for example.  The pins I do with the girls are probably my favorite ones.  I've really enjoyed my time with them and I think they definitely love to experiment with pins as well, especially Butterfly.

As I've gotten more confident I progressed into pins made me feel as if I accomplished something, like when I replaced my own leaky spray hose for the kitchen sink.  I look forward to the day when I feel comfortable enough to do more with my house.  I would love to add an inset wall cabinet in the bathroom for instance.  But that can wait for later.  Still taking baby steps for now. 

I have also experimented with ways to make promotional items for my business, an eye pillow, printing on fabric, etc.  This has done wonders for making me less frustrated with advertising for my business.  I've even gotten off my butt and joined the Chamber of Commerce to work on better networking strategies.  Again baby steps here.  I am working up my confidence to start interacting with more Orthopedic physicians and physical therapists. 

As you can see, my gambit paid off wonderfully.  Over the past month I have learned countless new crafts and skills.  Pins I marked because I liked them, but never thought I would get around to doing, are being done everyday.  Not all of them have been a great success, but I think that will come more with practice.  All in all it has made me get up and move, become more interactive with my family, friends and life in general.  Most days are now so filled with new ideas and experiences that I find myself incorporating multiple pins into a project, coming up with my own ideas or helping Butterfly with hers, and sometimes, like today for instance, the day is so jam packed with fun that I don't even have time to do a pin.  I will continue to plug away, living life to its fullest and sharing it all with you.  Wish me luck as I continue on my journey as I wish you luck on the start of yours.  As they say, whoever they are, the first step is the hardest one, but once you start it all snowballs and you will find it hard to stop.  So get out there and start enjoying life.

DIY Sleep Mask

Recently a photographer friend of mine asked me to do chair massage at an event she had planned.  The idea was to provide a pamper yourself day to promote her new Boudoir photo shoots.  At the event there will be free facials, massage, hair/makeup, and a Boudoir photo shoot for the customers.  I decided to attend the event, but I needed a promotional item to send home with the customers to remind them to think of Optimum Health Pain Management Center for all their massage and acupuncture needs.  I was trying to think of something that would go great with the pamper you and boost self-esteem theme. 

What would fit that better than a sexy satin Boudoir sleep mask to catch up on your beauty rest.  Add to that a tag with my business logo and web address, et voila you have a great marketing tool to keep them thinking about you every night when they use their new sleep mask.

Now I just needed to make them.  So I looked it up on my handy Pinterest boards and came up with a project that would be quick and easy.  I also found some pics of other sleep masks that had been fancied up with lace trim and beautiful, sexy fabric.  First off though I just made a basic one to see what it would look like when finished.  That way I don't waste expensive fabric if it doesn't come out right.  I can always modify it and add the finishing touches later.

DIY Sleep Mask
 
Step 1:  Print out the pattern (click here).  The pattern for the mask was found here at The Wonder Forest.  Now I know, the pattern looks huge, trust me it's not.  It will come out much, much smaller after you sew it all together.
 
Step 2:  Once you have your pattern printed, pin it to your fabric and cut it out (you will need a front, back, and inner fabric).  I used a fancier, pretty fabric for the front face that everyone will see, a satiny soft fabric for the piece that goes next to your face, and then I used some quilting batting to make the mask fluffier, but you could also use interfacing or felt just to give it added strength.  I pinned the pattern to all three fabrics at once so I only needed to cut once, but you could also cut out each individually if you prefer. 

It should look like this when you are done cutting them out.  You need one cut out of each fabric.


Step 3:  After you have them cut out you will need to put them together for sewing.  Start by placing the outer face right side up.  Then if you are attaching an elastic band to fit around the head place the elastic piece on top of the outer face, matching the edges to the raw edges of the fabric.  Next you will place the inner face of the mask right side down on top of the elastic and outer face.  Finally you will lay your inner fabric on top of that.  We are sewing the mask together inside out so that when flipped right side out the seams will be hidden.  Therefore, you will need to leave a small area unsewn in order to flip right side out.

Note:  If you are sewing on a trim to the outside you would not need to hide the seams and could, therefore, stitch it right side out to begin with.  For detailed instructions see the original post above.  You could also add some lace at this point before you sew if you wish the edge to be hidden.

Step 4:  Stitch around the edges of the mask, trying for as small a seam allowance as you can.  Here I used a 1/4" seam allowance which turned out to be too big and the mask came out a little bit too small.


Stop sewing about 1-2 inches before you get to where you started.  You will need this gap to turn the mask right side out again.
 

Step 5:  After you have finished sewing the mask together, flip it right side out through the hole you left in the seam.  You did leave a hole, right?  After you flip it I recommend using a chopstick or pencil, etc. to push the edges all the way out for a nice clean look.
 

Step 6:  Now you need to stitch up your hole.  You can use a ladder or slip stitch to close it up.  Alternatively you could also top stitch along the entire length of the mask.
 
If all went as planned it should look something like this, except I couldn't find my elastic so yours will have an elastic band to fit around the head and hold the mask on.


That's it for today.  I will post some updates of the embellished masks later on.  Until then, wish me luck.