Wednesday, February 3, 2016

The Gift of Happiness: How to make an edible arrangement


The New Year is supposed to be a time of celebration and new beginnings, a chance for a brand new start. But as is usually the case in my world Murphys Law happened and all hell broke loose. I've come to the conclusion that this year is going to be a rough year and looking around me I see that I am not the only one affected by the storm. 


After some thought and not a little bit of wallowing I decided to expend a little extra bit of effort to make those around me just that little bit happier by letting them know I care. Something so easy to do but usually only done on special occasions, holidays or when one is feeling guilty. Lest you think I am being selfless and altruistic, let me just say that in this I am motivated by completely selfish reasons. Try as I might to make myself happy if those around me are depressed it brings me down as well. Hence the need to spread a little sunshine around and lift the depressing cloud that is 2016 for everyone. 

The plan?  Well just do small, tiny things on a regular basis that I know will bring a smile. Case in point: filled my husbands candy jar the other day and gave him a massage yesterday, made a banana cream pie for my sister and played cards with my mom. Instantaneous smiles all around and a nice warm feeling in my heart. 


Which brings me to my blog, lost and lonely like a neglected child. It's time to dust it off and bring it back to life if only to give my beautiful Butterfly something to look forward to every week. 

How to Make an Edible Arrangement


Inspired by an edible arrangement a colleague received on Valentines Day I decided my mom would love one of those but was daunted by the exorbitant price tag. Therefore I resolved to make one myself. Here's how I did it. 

Supplies

Fruit
Chocolate
Skewers
Festive container
Cookie Cutter

Step 1
Decide on a theme for your arrangement. My coworkers was made to look sort of like a flower arrangement and was in a small tin. I found a cute oversized margarita glass and naturally decided to make it look like a tropical margarita. 


Step 2
Prepare the fruit. 
I decided to use pineapple, grapes and chocolate covered strawberries with a watermelon base to stick the fruit skewers into. 

I first cut the watermelon in half and gingerly cut the rind off the outside. This then fit perfectly into the glass to create my margarita. 


Next I pushed a few grapes onto skewers for garnish and placed them in the watermelon near the side of the glass. 


Then I cut the rind, top and bottom off the pineapple and sliced the pineapple trying to make about one inch thick pieces as large as possible. Using a cookie cutter I then cut my pineapple into shapes. 


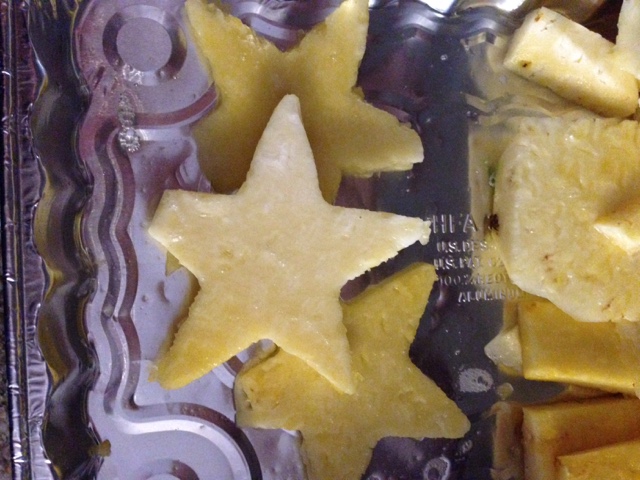
And skewered them (only one held up though since the others weren't thick enough). 


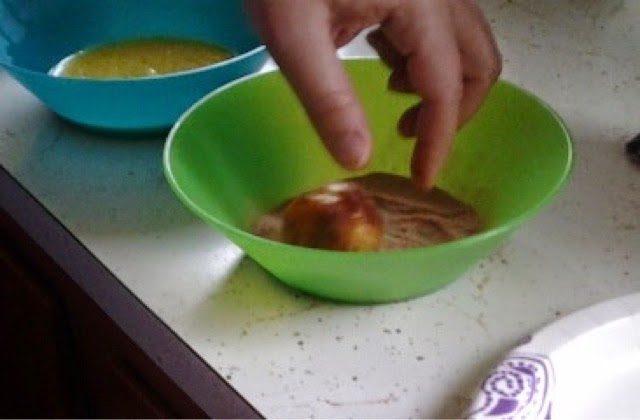
Then I set about making the chocolate covered strawberries (a pin in themselves). I consulted a couple of different pins  for melting the chocolate but it was a huge disaster. My chocolate kept coming out chunky (although the addition of butter to the chocolate made great tasting chocolate candies when placed in a pretty mold). Finally after lots of trial and error, two hours later I finally hit on the key to melting chocolate. I poured some chocolate chips into a small dish and microwaved it for fifteen second intervals, stirring in between intervals until it was smooth.


 Then I poured the chocolate into another dish stirring occasionally to temper it and create that nice shell (thank you boys and girls at WikiHow).  I then dipped my room temp, completely dry strawberries into the chocolate and set them onto parchment paper in the fridge to cool for 15-30 mins. 


Step 3

Next decorate your arrangement. 


Step 4

Hand deliver for that extra special touch. 
Note:  I used a clear plastic trash bag to cover the fruit and tied it off with some ribbon. It was a great success. Her coworkers even asked where I got the pretty flower chocolates because they tasted so good. 

Mission accomplished. Until next week. 


Tuesday, January 13, 2015

AWOL


You must be wondering where I've been. I apologize for going AWOL this past week. Unfortunately I was fired from my primary job and it hit me kind of hard. I've never been fired before and was in no way prepared for it. At first I didn't think about the blog at all and when it did finally come to mind I seriously considered dumping it all together. I mean where do I find the money for projects when I have no income. 

Watching my beautiful Butterfly, my staunchest supporter, check religiously to see if I've posted anything new made me realize that there is at least one person out there that looks forward to these posts and I couldn't let her down. Therefore I have decided to continue my blog. 

The new me will be using items from around the house to make fabulously creative crafts and food. Everyone's got to eat right?

This has never happened to me before and at first I was quite lost as I'm sure you would be too. So let's just take this one step at a time. 

Step 1:  


Take a day to calm down, cool off and wallow in self pity. Trust me you won't be able to think clearly for a couple of days anyway. You might also want to take some Tylenol preemtiviely at this point because later that day you will have one whopper of a headache from all the stress. 

Everyone is different, for me I prefer solitude at this juncture and so I took it. But if you are the kind of person who needs a shoulder you can and should lean on your friends and family. They will be nothing but supportive. 


Step 2:  Now that you have taken a day, no more than two, get on the ball. Find out if there is an appeals process for your termination. They won't tell you but you usually only have a few days to request one. If you are unsure about anything ask others and yes you can call up the HR department and ask them questions as well. You'll find out interesting things like there is such a thing as unemployment (seriously I've never been fired, no idea) and that future employers can only verify dates of employment. 

Step 3:  Speaking of unemployment, get online and apply for it. Or at least read up on it first. For instance I found out I can't apply for it until next week because I made over $380 in income for this week. So for me it's a waiting game until next week. No problem, the website had links to some job sites which I took full opportunity of looking at. 


Step 4:  Which brings us to step 4. Look at some job sites. Get a feel for what's out there and take a second to realize that there are jobs out there. You WILL be okay. Also take a moment to think whether or not you want to break into a new industry or job. This is a time to reinvent yourself. Take a look at other types of jobs and figure out how your experiences and skills fit into them. 


Step5:  Okay so at this point you may have seen a job that popped out at you, go to apply for it right away with hope in your heart and realized you don't even have a resume because you haven't needed one for quite some time. Don't fret, now's the time to set one up. 

Pull out a piece of paper and brainstorm what jobs you have had with dates of employment, lists of duties (tip: go online for job descriptions of the job and utilize key words from the job descriptions), skills and any contributions you made to the company. It can be daunting looking at a blank resume template.   Brainstorming some things ahead of time in an unstructured format can keep the pressure off. You may also like to brainstorm types of jobs that sound interesting to you and find out more about them. 

Okay. Now that you have some basics, fill out a more structured resume. You can use a template from Word or just make one up yourself. Go online and look up sample resumes for the types of jobs you are interested in, find one that is professional, fits the needs of the jobs and feels comfortable for you. Loosely fill it out and set it aside. 

Step 6:  Okay we've done a lot in just a few days time. But you may be feeling downhearted and frustrated at this point. I was too. All the waiting and hunting, not knowing what the future will hold. 


Time to gain back your confidence, your spark, you will need this for the upcoming interviews. Do something. Anything really, that makes you feel like you are contributing. Volunteer for an organization, help a friend or neighbor move, or something as simple as I did. 

How I gained back my spark. 
It's the middle of winter here and with temperatures dropping an old house is freezing. Needing to save money we have cut down on our heating usage leaving us with just blankets. So my mom and I went around the house and insulated the windows with cardboard. A little ghetto, I know, but it has helped immensely and, bonus, made me feel as if I accomplished something. Thanks mom. 


On the same note. Call around to all your bills, the phone bill for instance, and try to get a better rate. I saved $70 a month by changing to a different cell plan. One that incidentally was better than the one I currently had. 


Step 7:  Now it's time to get back to business. Serious job hunting. Okay before we can refine our resume we need to know what jobs we are applying for. So go a hunting. At first look for something that will both pay the bills and be exciting for you. As the weeks wear on you can lower your standards, but for now hold out for a few days and go for a dream job. Or at least one you will be comfortable with. 

But just remember, if it comes down to it at some point you will need a job, any job whether it pays good or not. If it comes to this point don't be afraid or too proud. Just take it and keep working on finding that dream job. 


By now you have found some jobs and you have a basic resume. From here comes the tedious part, tweaking your resume to align with the job in question. Pinterest has all kinds of valuable information on how to do this with dos and don'ts of the trade. Utilize it. Also research the company and job you are applying for to figure out the key skills and traits they are looking for. Without fabricating fake skills, etc. use these key words in your own resume to gain their attention and make you stand out as the perfect candidate. 

Once you have honed the resume down to a perfect point, practiced your interview questions and brushed off the suit, send it out into the universe and apply, apply, apply. 


There you have it folks. You are well on your way to getting back on your feet. Don't forget to apply for unemployment in the meantime, keep busy to avoid depression and most of all remember that you will be okay. 

Alas that is all I have for you today as this is where I am in the process. Stay tuned and wish me luck. 

P.S if you know of any jobs in the Omaha, NE area send them my way. :)

Monday, January 5, 2015

Curtains


After we bought our house we realized that the previous owners took the curtains with them. Bummer but it wasn't worth losing our house over so we let it go. So instead we have these lovely tarps up over the windows in the meantime. Hubby has been bugging me to make the curtains so yesterday I decided to do just that. 

Ages ago when I decided to make my own curtains instead of buying them I used a formula from this site (http://xoimagine.com/how-to-calculate-yardage-for-window-coverings-drapes-and-curtains/to figure out how many yards of fabric I needed and then I went to the local fabric store and bought some home decor fabric. 


What do you think?  Pretty huh. And only $7 per yard. I suggest waiting until the fabric goes on super sale or it can get really pricey. 

The next step was trying to figure out how I wanted to hang my curtains. I'm thinking just a simple rod that slides into a pocket along the top edge of the curtain. I thought about lining the curtain but decided against it to save on money. 

Most of the pins I looked at involved curtains with lining so I just decided to wing it.  First I found out the width and length I needed the curtains to be. For instance, in the living room I have three windows in series on one wall that are about 128" wide and 80" from the top of the window to the floor. There were several ways to hang a curtain or curtains and I decided for this bank of windows to have two panels for each window, one on either side of each window. Kind of like this. 


After crunching the math I decided I would need six panels (my fabric width was 54" and I needed to cover 128" with extra width added for fullness). Six panels would work great giving me one panel on each side of the three windows.   If you smell something burning right now it's just the smell of my brain working overtime to figure all this out. 

I'll try to make it simple. You figure out the entire width you need to cover and multiply it by 2.5 for fullness. Add a few inches for seam allowance. Then divide that by the width of your fabric. This will give you the number of panels needed to cover that distance. Now you can choose to sew panels together to get one wide curtain or have several panels to cover the distance like me. It works out nicely because I have three windows all lined up next to each other. 

Now that I know how many panels I need I made a test panel to make sure all my measurements were correct. Since the height I need to cover is 80" I added 2" for a bottom hem and 8" for a pocket along the top. Again had to use some math to figure that out. I wasn't sure what diameter rod I would be using so I decided to just go big.  Adding 8" to the top will be a little less than four inches doubled over after seam allowance and will accommodate up to a 2" diameter rod comfortably. 

Okay now that all that was taken care of I cut out my fabric, 90" in length the entire width of the fabric. 

The salvedge had a nice frayed edge that looked neat so I simply folded it over on the sides a 1/4" and sewed a straight seam on the sides. 


Next I sewed the pocket along the top edge of the fabric by folding it over a 1/4", stitching a straight seam then folding it over 4" and sewing another straight seam. 


As you can see I used chip clips to keep it straight while I sewed because I hate ironing. 

Then we hung it up to check the length, which was perfect yay!  Then I stitched a two inch hem along the bottom to finish it all off. 

One down five to go. Wish me luck. 


Wednesday, December 31, 2014

Monday Donut Delights with guest blogger, Butterfly


Since my wonderful niece, Butterfly, is so supportive of my blog and always on hand to help out with pins, even doing ones of her own, we thought it would be a great idea to showcase her here on my blog. 

Without further ado please welcome our guest blogger, the amazing, the wonderful, Butterfly and her super yummy pin. 

Delightful Donuts
Hi, this is Butterfly! I am this blogger's niece  and every once in a while I will write a blog post. I did an awesome pin on Monday. Make your own homemade, inexpensive DONUTS! For a link to the original pin.

Stuff you will need:
Homestyle biscuits by Pillsbury
Butter ( or margarine whichever you are more comfortable with)
Cinnamon and Sugar
Oil

Tools:
Pan
Bowls
Tongs ( or something of the nature)
Spoon
Medicine cup

I bet about now you are thinking these won't taste like donuts. These will taste like biscuits, not donuts. You are wrong, trust me we all thought they would.

First step: Open your Biscuits and lay on a clean surface (we used a cutting board) Take your Medicine cup or a circular item (cookie cutter...) and press it into the biscuits. 


Roll your biscuit gently off of the medicine cup and keep the circle from the biscuit ( these will be the donut holes). Repeat this step for the rest of your biscuts.

Second step: Grab your pan and add oil. Enough to let the donut holes float partially. Heat the oil and put the donut holes in the pan. 


Flip when golden brown on the bottom. Use your tongs to take out of pan then place on the plate. 


Third step: Get your two bowls and a plate ready. 

In the first bowl put in  your margarine in and melt in the microwave. The second bowl will contain cinnamon sugar. It should look something like this. 


Take your donut holes and dip in butter (don't  put too much or the cinnamon sugar wont stick). 


Then dip in cinnamon sugar and lay on plate. Volia!  Repeat this step for all donuts.


Do the same steps for the big donuts. Here are those pictures. 


Thanks for reading my blog post and comment if you like it. Bye!

Thank you so much Butterfly. You guys did a great job. They really did taste like donuts. Yummy. I'll have to make some myself. Wish me luck. 

Monday, December 29, 2014

Quote of the Day

Okay so I had a rough day (trust me you don't want to know) and, therefore am going to take the easy way out. 

Here is a lovely pic from themetapicture.com that even in my despair made me laugh so I thought I would share it with all of you. 


Let me know if it makes you laugh too. But seriously it might be true. 

Alright I'm off to bed. Let's hope the nightmare is over. Wish me luck. 

Monday, December 22, 2014

DIY Photo Canvas


Last time I did photo canvas coasters and they came out great so today I thought I would do a photo canvas to hang on the wall. Hoping for a better quality picture I used an actual photo instead of one printed on computer paper to see if it would work as well. 

I followed the same steps as last week. 

Step 1: get photo

Note: if you wish now would be a good time to paint the edges of the canvas or you can just leave it white as well. 


My picture was smaller than the canvas so I painted a border as well as the outer edges. 

Step 2:  smear a thin layer of modge podge across the canvas. Then quickly place the photo face up on the canvas, using an old credit card to smooth out any wrinkles. 


Step 3:  once it has dried, smear another layer of modge podge evenly across picture and canvas if showing. 


Et voila you have a beautiful canvas photo. Well after it dries and the white goes away. While it turned out pretty good I think I like the look and texture of it better when done with printed computer paper. 

Unfortunately I haven't been having much luck with transferring a photo to wood. I'm still working out the bugs. I'll let you know the low down when I figure it out. Wish me luck. 

P.s.  I won't be posting on Thursday due to the holiday. So until next time, Merry Christmas to all and to all a good night.

Thursday, December 18, 2014

DIY Canvas Photo Coasters


My mom has been missing her kitties while they are in lock-up at the county boarding house.  Springing them isn't an option until she finds a new place so I thought I would make her some commerative kitty coasters to reminisce over while they are gone.  I have some of my lil doggies from over the years and I absolutely love them.

While down at the local craft store, I saw some canvases in a perfect coaster size for $1 on sale so I picked them up along with some Modge Podge and looked up the pin on how to transfer photos to canvas.  I know I've seen that around somewhere.  Oh yes here it is.  Wonderful tutorial.

Didn't take long only about an hour with drying time and everything.  It took longer to pick out the pictures than it did to make the coasters.


Step 1:
Pick out some cute and cuddly kitty pictures.  Check.


Step 2:  Print out said pictures and cut them down to size (4X4 fit perfectly for the coasters).

Step 3:  Paint a thin layer of Modge Podge (matte finish) onto the canvas coaster, then lay the photo face up on top.  Quickly use an old membership or credit card to smooth out the surface, getting rid of all the bubbles and wrinkles.  Trust me I forgot this step and have some wrinkles on the coasters.  Good news is you don't notice from a good eye distance away.  Phew!  Let dry.


Step 4:  After the pictures have dried, coat with another thin layer of Modge Podge and let dry again.  Repeat as many times as you like to create a nice seal on top.  I should probably have done more than one coat, but...


Note: the picture didn't fit the coaster so I painted the edges black. 


Step 5:  Enjoy your coasters


All in all it turned out pretty good and I'm pretty sure the mamas will like them.  Next up transferring photos onto wood.  Found out it requires a gel medium, not Modge Podge so it looks like I'm headed back to the craft store.  Wish me luck.