


After some thought and not a little bit of wallowing I decided to expend a little extra bit of effort to make those around me just that little bit happier by letting them know I care. Something so easy to do but usually only done on special occasions, holidays or when one is feeling guilty. Lest you think I am being selfless and altruistic, let me just say that in this I am motivated by completely selfish reasons. Try as I might to make myself happy if those around me are depressed it brings me down as well. Hence the need to spread a little sunshine around and lift the depressing cloud that is 2016 for everyone.
The plan? Well just do small, tiny things on a regular basis that I know will bring a smile. Case in point: filled my husbands candy jar the other day and gave him a massage yesterday, made a banana cream pie for my sister and played cards with my mom. Instantaneous smiles all around and a nice warm feeling in my heart.

Which brings me to my blog, lost and lonely like a neglected child. It's time to dust it off and bring it back to life if only to give my beautiful Butterfly something to look forward to every week.
How to Make an Edible Arrangement

Inspired by an edible arrangement a colleague received on Valentines Day I decided my mom would love one of those but was daunted by the exorbitant price tag. Therefore I resolved to make one myself. Here's how I did it.
Supplies
Fruit
Chocolate
Skewers
Festive container
Cookie Cutter
Step 1
Decide on a theme for your arrangement. My coworkers was made to look sort of like a flower arrangement and was in a small tin. I found a cute oversized margarita glass and naturally decided to make it look like a tropical margarita.

Step 2
Prepare the fruit.
I decided to use pineapple, grapes and chocolate covered strawberries with a watermelon base to stick the fruit skewers into.
I first cut the watermelon in half and gingerly cut the rind off the outside. This then fit perfectly into the glass to create my margarita.

Next I pushed a few grapes onto skewers for garnish and placed them in the watermelon near the side of the glass.

Then I cut the rind, top and bottom off the pineapple and sliced the pineapple trying to make about one inch thick pieces as large as possible. Using a cookie cutter I then cut my pineapple into shapes.

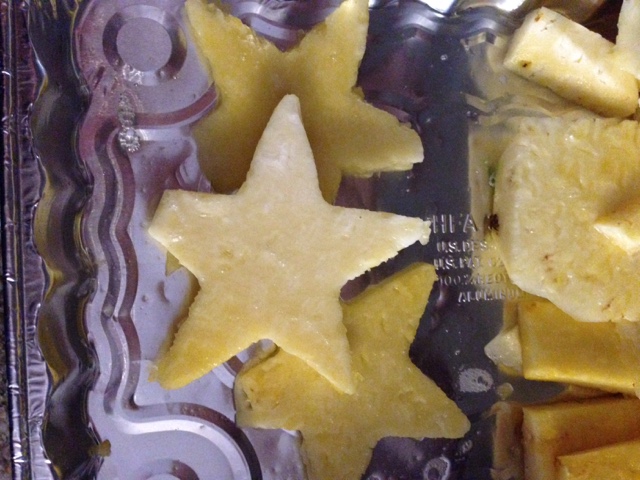
And skewered them (only one held up though since the others weren't thick enough).

Then I set about making the chocolate covered strawberries (a pin in themselves). I consulted a couple of different pins for melting the chocolate but it was a huge disaster. My chocolate kept coming out chunky (although the addition of butter to the chocolate made great tasting chocolate candies when placed in a pretty mold). Finally after lots of trial and error, two hours later I finally hit on the key to melting chocolate. I poured some chocolate chips into a small dish and microwaved it for fifteen second intervals, stirring in between intervals until it was smooth.


Then I poured the chocolate into another dish stirring occasionally to temper it and create that nice shell (thank you boys and girls at WikiHow). I then dipped my room temp, completely dry strawberries into the chocolate and set them onto parchment paper in the fridge to cool for 15-30 mins.

Step 3
Next decorate your arrangement.


Hand deliver for that extra special touch.
Note: I used a clear plastic trash bag to cover the fruit and tied it off with some ribbon. It was a great success. Her coworkers even asked where I got the pretty flower chocolates because they tasted so good.
Mission accomplished. Until next week.
You are a wonderful and thoughtful daughter. My Valentine's fruit Margarita was fantastic!
ReplyDeleteVery impressive assignment writing services publication here. Moreover as I see, this question is very actual for many people indeed. Personally I totally agree with author opinion about this subject and I think that it would be really interesting to create such discussion with other this website visitors. Anyway thanks a lot one more time for the great and informative publication.assignment writing service And I will definitely be waiting for more such nice posts like this one from you. Kind regards, Peter Rickson.
ReplyDeletePILGRIMAGE SITES Bethany Beyond the Jordan is one of the foremost sites of pilgrimage. Air Jordan Shoes,According to the Bible and numerous ancient texts, it is here that Jesus Christ was baptised by the preacher John the Baptist and anointed by God. It is said that during his stay in Bethany Beyond the Jordan he first prayed to God and gathered the first of his disciples, Nathanael, Peter, Simon, Andrew and Philip. Nearby, a cave has been identified as being that where John the Baptist lived. In Byzantine times the cave was transformed into a church. Throughout this area arc the remains of many other churches and monasteries, including one believed to be an early Christian prayer hall. Cheap Jordans,You can still see some remarkably wcll-prcscrvcd mosaics that would have adorned the floor of its central hall. Located on Elijahs Hill and dating from around the 3rd century, it is believed to be one of the earliest examples of a religious building used for prayer.
ReplyDeleteBethany Beyond the Jordan lies in the Jordan Valley as it approaches the Dead Sea from Amman. In the Bibles Old Testament Book of Genesis, jordan releases,God is credited with describing the Jordan Valley created by the Jordan River as the 'Garden of the Lord'. Many scholars believe this to be the Garden of Eden, home to the first man and woman created by God, namely Adam and Eve.
I really had a great time with your post! I am looking forward to read more blog post regarding this! Well written! http://awriter.org/freshessayscom
ReplyDeletebryce wilson, l bryce wilson photographer l bryce wilson photographer l bryce wilson spiderman l bryce wilson melbourne l bryce wilson australia l bryce wilson drjft l bryce wilson l bryce wilson photographer l bryce wilson photography l bryce wilson spiderman l bryce wilson melbourne l bryce wilson australia l bryce wilson drjft l bryce wilson l bryce wilson photographer l bryce wilson photography l bryce wilson spiderman l bryce wilson melbourne l bryce wilson australia l bryce wilson drjft l bryce wilson l bryce wilson photographer l bryce wilson photography l bryce wilson spiderman l bryce wilson melbourne l bryce wilson australia
ReplyDeleteI really had a great time with your post! I am looking forward to read more blog post regarding this!
ReplyDeleteสูตรบาคาร่า
โกเด้นสล็อต
Beautiful work.
ReplyDeleteศัลยกรรมตาสองชั้น
ReplyDelete• 1.กรีดหนังตา เป็นแนวทางที่เคยชินกันดีกับแนวทางการทำตาสองชั้น หรือจะเรียกว่าวิธีมาตาฐานก็ว่าได้ เนื่องจากมีผู้กระทำตาสองชั้นด้วยแนวทางแบบนี้มีมากที่สุดเป็นอันดับหนึ่งเลยเดียว
• 2.การเจาะรูหรือบางที่เรียกแนวทางการเย็บจุด เป็นการไม่ต้องกรีดหนังตาแม้กระนั้นกลายเป็นการเจาะรูเล็กๆที่กลีบตาห่างกัน 3-4 จุด สามารถเอานำไขมันส่วนเกินออกได้ แล้วกระทำเย็บเงื่อนไหมไปตามแนวเส้นที่ได้กำหนดไว้กับกล้ามเนื้อตา จะมีผลให้กำเนิดเป็นตาสองชั้นขึ้น ข้อดีก็คือไม่ส่งผลให้เกิดรอยแผลเป็น รวมทั้งมีการบวมช้ำเพียงนิดหน่อย
• 3.การเลเซอร์ ได้แก่การใช้เลเซอร์คลื่น plasma ยิงไปที่หนังตาทำให้มีหนังตา 2 ชั้นขึ้นมาอย่างสบาย ถึงจะเจ็บจี๊ดเกือบจะร้องไห้ แต่ว่าจุดเด่นก็คือทิ้งแผลเอาไว้น้อยมาก ใช้เวลาพักฟื้นน้อยมาก ดำรงชีวิตธรรมดาได้เกือบจะโดยทันที
มาเด้
มาเด้ หน้าใส
ฉีดมาเด้ ที่ไหนดี