Saturday, October 4, 2014

Self Massage with a Foam Roller

Laying down for bed last night I had a hard time getting to sleep because my butt was so sore.  No joke, it just ached and ached.  Working out five days a week is doing great for my back pain, but it is sure making my muscles ache from the strain.  After getting a massage today I felt way better.  I decided that the answer to my aches, therefore, is to get a massage everyday. :)

Now even as a massage therapist who can do trades with other therapists this is just not feasible.  That leaves self massage, but how to massage your own butt?  I normally just use a tennis ball, but this takes a long time to methodically go through all the trigger points in the gluts.  What I need is something I can use to quickly and easily massage large areas like the gluts, hamstrings, and quadriceps. 

While in San Diego I had the opportunity to massage a lot of BUDS trainees (AKA navy seals).  These guys work hard and as a result abuse the heck out of their muscles.  One of my patients alerted me to the functionality of a foam roller and how great it is for self massage.  I never really used it much myself at the time, but was aware of how much easier it made my job if the guys used it on a regular basis.  As sore as my muscles are now I think it's about time I learned how to use mine properly.

I found this really great info-graphic on Pinterest showing how to use the foam roller for massage of a variety of muscles.  So I rolled it out and thought I would share my trials and tribulations.

I just did the massages for my legs and gluts.  I didn't do the one for the hip flexors because I just couldn't see how it would actually massage the hip flexors which are basically hidden beneath the intestines and much too deep to be rolled with the foam roller in my opinion.

The one for the IT band is a doosey.  It hurts, a lot.  My IT band is apparently very, very tight and as such is incredibly sensitive.  Too sensitive for the hardness of my foam roller.  I will have to try it another way in the future.  I did roll up at the top of the hip, however, to get the Tensor Fascia Latae. 

I also did my hamstrings which worked out really well.  I will say though that it takes a lot of core and arm strength to hold yourself up.  I got a pretty good workout.  The gluts were also really sensitive, but doable.  I also improvised and flipped over to roll out my quadriceps  the same way as I did for the hamstrings (just on the front side instead).

All in all it worked out pretty well and I think I will continue to roll out my leg and glut muscles in the future.  Wish me luck.
 

Wednesday, October 1, 2014

Getting Rid of the Bat Wings


Do you remember the day you first realized you had bat wings for arms?  Maybe you were raising your hand to answer a question or waving goodbye to a friend and that flab just started jiggling around.  Talk about embarrassing.  I don't even remember when or how it happened, I just know that now I have them when before I didn't.  Probably happened when I turned thirty.  I've decided thirty is the age where your body starts to fall apart and it is an uphill battle everyday to keep it from happening. 

Today ladies we are going to figure out just how to rid ourselves of that horrible arm jello.  Looking on Pinterest I found several pins on how to do just that.  I've decided to try them all one at a time to see which ones have the most effect.  Today I started with 10 Minutes to Toned Arms with Andrea Orbeck, Celebrity Trainer. 


The video is fast-paced and promises fit arms in only 10 minutes.  How can you resist!  While the workout wasn't very challenging, I did feel the burn when we got to the triceps exercises.  I would have liked to see more variety including workouts for muscles other than just the triceps and biceps, but what can you expect in just 10 minutes right?  I give it a 5/10.

I did like the exercises, however, so I'm not ready to give up on it quite yet.  I think it would be best served as an addition to an overall arm, chest and back workout.  Next up finding videos to supplement what is lacking in this one.  Wish me luck.

A Walk Among the Tombstones


Did you ever have a tradition as a child?  Something you did every week with your family?  For me it was movies.  I remember looking forward to Friday nights when we would all go out and see a movie together.  So naturally when I got older and moved away to college, I continued this tradition on my own even though I wasn't always able to get back home every week.  In those instances I would go by myself. 


Movies are great, second only to reading books for me.  They are a way to experience a gamut of emotions and adventure vicariously through someone on the big screen.  Watching movies has become so ingrained as a part of my life that I felt as if a piece of me was lost when all the Blockbuster's and other movie rental places started dying off one by one.  It's all supposed to be easier now to just stream the movies on Netflix, Hulu, etc but really it's not.  Half the time I can't even find the older movies I grew up watching as a kid.  Which truly saddens me.

Movies these days have changed.  With all the awesome technology these days they should if anything be better, but it seems instead that good dialogue and plot has been sacrificed for gore and special effects.  Add to that the outrageous cost of movies these days and I must admit, I probably only go to the movies once or twice a month now.  


One of those times happened to be today.  The Marcus Majestic theaters by us has a $5 Tuesdays special that enticed us to go out and see a movie tonight.  I know I usually write about a pin I did or made up, but today the movie we watched inspired in me once again a love of movies so I thought I would write a movie review instead.


While talking with my dad this week he mentioned that he had gone to see A Walk Among the Tombstones.  Not having gone to the movies much lately I'll admit, I didn't even know what it was about.  So when he said it was terrible, I filed it away in the back of my mind along with the caveat that it probably wasn't an action movie.  I say this because if you knew my father you would know that he has seen so many movies that he has become numb to any that don't involve nonstop action.  In fact, most of the time he just falls asleep during the movie, kind of like my hubby come to think of it.

Speaking of hubby, when he mentioned that we should go see a movie tonight I was all for it.  I usually let him pick the movie and today he picked A Walk Among the Tombstones.  Not really knowing what to expect I went anyway and was pleasantly surprised.  It was the best movie I have seen in a very long time.  Contrary to what my dad said, I thoroughly enjoyed it.  It had just the right amount of plot, dialogue and action to keep me interested throughout.  While there were a few graphic parts that made me turn away, they stopped just short of the gore for no reason category.  And who doesn't love Liam Neeson?  That man is amazing, a really great action star who can actually act as well.  I think he would have made a good James Bond at some point.

The movie revolves around an ex cop AA junkie who highlights as a private investigator.  In this instance he gets hired to investigate a couple of serial killers who kidnapped and killed the wife of a drug dealer.  That may not sound like the most interesting of plots, but trust me it works.  The rest of the movie follows him as he roots out the who, what, where, when and why of the serial killers, ending in a climactic showdown between him and the bad guys.  While there was no super kooky twist, there didn't need to be.  

In a day and age where movies have started to lose their appeal, A Walk Among the Tombstones has instilled new life into a family tradition I thought was lost.  Perhaps there will be more like this one that will redeem the movie industry.  Wish them luck.

Tuesday, September 30, 2014

How to Build Core Strength


Some people get claustrophobic in elevators, I get claustrophobic in shoes.  As a child I was one of those wild jungle kids that ran around bare foot climbing trees.  My feet were calloused and hard because my parents could never keep shoes on me.  Even now I mostly wear sandals because I absolutely hate to wear shoes.  

Growing up in sunny California I was able to get away with a pair of sandals, but once I moved to the midwest I was forced to buy a pair of tennis shoes to outlast the winter months.  This past winter as I bent down to tie my shoes I realized that I am now too heavy to bend over and tie my shoes.  The more I thought about it, the more I realized how much my weight affected me.  Pain under my ribs from my bra being too tight, pants too short because I'm growing too big for them and a dozen other things I don't wish to recount for an audience.  

Not being able to tie my shoes was the last straw, the hump that broke the camel's back so to speak.  It was time to do something about my weight, but what could I do?  All the exercises I loved to do before my back injury just flared up my condition, part of the reason I gained all this weight in the first place.  There had to be another way.  

I needed a way to strengthen my core, without doing sit ups (they only make it worse), in order to support my back.  As a last ditch effort to do something I started doing push ups to work out my upper body and inadvertently stumbled upon a way to improve my core strength.  I now do push ups and plank type excercises everyday to improve core strength which is doing wonders to help support my back.  

After reading my post yesterday my mom tried to take my advice and do some push ups herself, but found that she couldn't quite do one.  I'll let you in on a little secret, at first I couldn't do a push up either, not even on my knees.  So today I thought I would detail exactly how to go about building up your core and arm strength so that eventually you too can do real push ups.

How to Build up to a Bona Fide Push Up

Step 1:  Start simple.  You probably won't have enough arm or core strength yet to do real push ups.  Instead you need to build muscle first.  Start off by doing push ups against a wall as pictured below.  Form is everything, keep your back straight at all times, bending at the arms.


Keep in mind that the closer you are to the wall or the wider your arms are, the easier it will be.  

Start off by doing as many of these as you can a day.  When you get up to 20-30 then move on to step 2.

Step 2:  Begin doing your push ups on an incline like a stair or bench or if you can on your knees on the floor.  Again make sure you are keeping correct form.  If you are too shaky to keep the back straight, butt down then you are not strong enough to do these right now and will need to do some planks or go back to step 1.


Work up to doing 20-30 in these postitions as well.  You may also start adding in a plank for core strength if you feel you are having a hard time keeping your back straight.


Step 3:  As you get stronger and feel more comfortable it is time to go to a full plank and real push ups.


Once you can easily hold a plank for 60 seconds and do 20-30 push ups at a time you can do more advanced exercises if you wish.

Step 4:  Get crazy.  Add leg lifts while doing the plank.  Or better yet work the obliques by turning to the side.


You can also vary your push ups by adjusting the arm width.  Wider is easier, closer together is harder.  Or you can even add a clap inbetween.  

While I can at this point do regular push ups and planks, I still prefer to stay at step 2 as I can't comfortably do 20-30 at a time on my knees.  It does take hard work and dedication, you will need to do it every day several times a day if possible to really build up your strength.  I still have a long way to go myself.  Wish me luck.

Sunday, September 28, 2014

How to Manage Pain


I was supposed to do a pin yesterday, but I just couldn't.  Instead I woke up with that all too familiar twinge of pain that makes me gasp and just about drop to the floor as my leg buckles underneath me upon standing.  Not sure what led to the flare up this time, I try to remain positive and go about my day, but it's just not working.  By the end of the day I've managed to get nothing done, couldn't work out, in fact I could barely walk.  My gait was more like a staggering shuffle accompanied by a chorus of gasps and groans.  What I hate about being in so much pain isn't so much not being able to do everyday activities, or even the fact that I can no longer do the things I love, I've become accustomed to that.  The thing I hate most about it is all the stares and looks I get and the fact that I have had to rely on someone else to take care of me at times.  I was doing so good recently, I don't want to go back to where I was before.  I just can't handle that.

Living with chronic pain is hard and there are others out there that know what I'm talking about when I say, "it's easy to become so consumed with the pain that you forget how to live."  Struggling just to make it through each day, believing that you have to accustom yourself to living with the pain or never doing those things you love to do.  It's wrong, just wrong.  We can find ways to manage the pain or even fight it off so that we can get back to living life as it should be.  It's not an easy road or a simple answer and kind of like rehab you have to admit you have a problem and want to fix it.


It sounds stupid, I know.  I mean who actually wants to live in pain?  No one.  It all comes down to that part where you get accustomed to the pain and because you thing you have tried everything, you think that this is the way it has to be so you stop trying, stop believing that you can live.  I'm not saying you will live completely pain free every day because you won't.  There will be flare-ups just like the one I am having now, but they will be less intense, shorter in duration and less frequent.

While I let the depression and pain get to me yesterday, I worked today on getting better by fighting the pain and I'm ready now to let you all in on how I manage my pain so that after almost two years of debilitating pain and a lifetime of chronic pain I was able to go three months with no pain at all.  I even started working out again and started bowling, something I never though I'd be able to do again.

How to Manage Chronic Pain


Step 1:  Have a good cry, get it all out.  Cry and scream out all the misery and pain.  Just don't give up.  Never surrender to the pain, the second you do it's all over.

Your pain is like your children, you have to set boundarys or they will walk all over you.


Step 2:  After several years of living with chronic pain you will think that you have tried everything to rid yourself of the pain, but just trust me, you haven't.  There is always another practitioner or doctor, chiropractor, massage therapist, acupuncturist, etc.  They are not all created equal, some practitioners are better than others.  Keep trying until you find one that resonates with you, helps you and then stick with it.

Your pain will always be there lurking in the background and just when you least expect it it will pop out and trip you up.  When this happens refer to step 1, then go see your practitioner for help.

As a practioner myself, I know how to fix other people's pain, probably because I've experienced so much myself, but when it comes to my own pain I always seem to make it worse.  When you are in that much pain all the time it messes with your mind and drives you crazy, making it hard to concentrate on the right thing to do for yourself.  At these times I find it better to let someone else help me out of the hole.  Then when I am feeling better, I take it upon myself, as should you, to continue self stretching, massage, and strengthening of my muscles to prevent future attacks.  If you don't know what to do ask your practioner for a regimen of self-care to do at home.


Step 3:  Never stop moving, stay active.  No matter how much it hurts, it will always get worse the second you stop moving.  Please utilize some common sense here.  Obviously if you are having a flare up take some time to recuperate.  Also don't over do it.  Stay active within reason.  The point here is to keep up some level of activity, not plop down and spend the rest of your life in a chair or scooter.

Lack of movement causes the muscles and tissues to seize up and/ or atrophy leading to more pain.  This will also lead to buildup of blood and fluids in the lower body, i.e. pitting edema in the feet or restless leg syndrome just to name a few.


Step 4:  Start a regimen of exercise to build strength

With a few bulging discs in my lower back I was having trouble walking.  With the use of acupuncture and massage I finally got to the point where I could walk without a cane or crutches with minimal pain throughout the day and some pain at night.  I became frustrated that every time I tried to workout as I had before my injury, it flared up my symptoms.  Therefore, I decided that I needed to change the way I excercised to avoid future flare ups.  If I couldn't work out my hips and back, I would then do only upper body workouts for now.

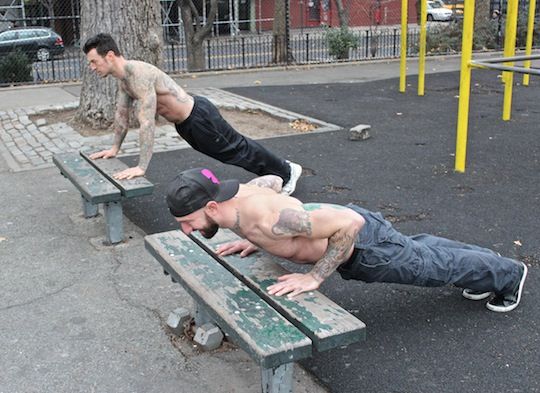
I started doing push ups and planks.  That's it.  Low and behold within two weeks I was able to sleep through the night without pain and had absolutely no pain during the day.  Amazing.  Next thing you know I'm at the gym doing cardio and free weights.  The thing about the push ups and planks was that it increased my core strength without harming my lower back as sit ups would have done.

Find what works for you and keep it up.


Step 5:  Last and final word of advice.  Once you figure out how to rid yourself and your life of pain and the depression that comes with giving up, live every day like it was your last.  Never take for granted the small things and enjoy those pain free moments.  Be patient with others that may be in as much pain as you once were and help those that need some support.


That's all I have for today.  I would like to say that I am all better now and living pain free once again, but that would be a lie.  The difference today is I know that I can be better it will just take time and a few good treatments.  On that note, I had my husband help me massage and do acupuncture on myself last night so that I can walk better today.  I also set up an appointment this week to get an acupuncture and massage treatment from people I trust.  I'm already walking better and in less pain.  By the end of the week I expect to be back to the gym and up for any activity I choose.  Okay maybe not every activity, but I'm working on it.  Wish me luck.


Saturday, September 27, 2014

Bites of Gooey Goodness

Getting home late I rummage through the fridge looking for something quick to eat.  I could make a sandwich, but I just had one for lunch yesterday.  I push the sour cream to the side and notice the left over burrito meat in the back of the fridge.  That sounds good.  I pull out the tupper and grab a couple slices of American cheese out of the bin.  Heading over to the cupboard I open it up and reach inside for the tortillas and realize with a pang of regret that we used the last ones yesterday.  Sighing heavily I open up the fridge again to look for something else, but nothing jumps out to catch my taste buds.  I don't really feel up to making something new, I just wanted a quick snack so I start thinking of ways to use the left over burrito meat.  Lazy tacos sounds great, but again I lack the necessary ingredient, Doritos this time.  

After a few minutes of blank staring I decide to enlist the help of my friends on Pinterest.  Just a few seconds is all it takes to land on a pin for mini mexican pizzas.  Sounds delish.  

How to make mini mexican pizzas

Step 1:  The original recipe used tortillas for this part, but as I said earlier, I didn't have any.  So I imporvised and whipped out a can of Pillsbury crescent rolls.  Use a cup or small bowl to cut circles out of your tortillas or dough.


Step 2:  Place circles of dough into a muffin tin.


Step 3:  Fill the circles of dough with desired ingredients.  I first filled mine with the American cheese slices so that there would be a cheesy gooey bottom.  


Then I layered on the left over burrito meat.  You could also make it up fresh and just add the seasoned meat as in the original post,  but I think that would take longer to cook.  My husband doesn't like beans so I just added some refried beans to a few of the bites for me.


Step 4:  Bake in the oven at 375 degrees for 10-12 minutes or until the crust is golden brown.  Let cool for several minutes then use a fork to pull out the bites and serve with any extras you'd like.  I just added sour cream and my honey ate them as is.

They were so good we finished them up within a few minutes.  This will definitely be on the menu again.  In the future I may even wrap the dough up and over the meat to make a little pocket of goodness.  Wish me luck.


Thursday, September 25, 2014

Frozen bananas

Most women when walking through the mall get excited about shopping for shoes or clothes.  All the flashy items calling to them from the store front windows.  Me on the other hand couldn't care less about a pair of heels or the latest Coach bag.  What calls to me every time I enter a mall is the thought of getting a frozen banana.  I don't really even like chocolate (I know, I know who doesn't like chocolate) I just love the taste of a frozen banana.  There must be some sort of magic that happens when you freeze a banana that just makes it taste better. 

I often buy banans at the store because I love them so much, but they go bad too fast to get more than two or three at a time.  Which isn't a bad thing because you can make banana bread out of the over ripe ones.  Making bread takes time, however, which I don't always have.  Not to mention the fact that hubby gets grossed out by the look of over ripe bananas.  He has this weird paranoia about food going bad.  I digress, the point is I needed something to do with all the extra bananas that would otherwise go bad if I don't use them.  

Therefore I had the brilliant idea after the last trip to the mall to make my very own frozen bananas.  The kind that only cost 50 cents a pound instead of four dollars a banana.  I didn't look up any pins just decided to wing it this time.  I mean how hard could it be to freeze a banana?

How to Make Frozen Bananas

Step 1:  Peel the bananas and either slice them into pieces for future smoothies or keep them whole to dip in chocolate or eat plain.


Step 2:  Place the slices and/or whole bananas on a flat cookie or baking sheet making sure to have a small space in between each one.  From what I have gleaned you need to freeze the fruit like this first so that they don't stick together or get freezer burn.


Step 3:  Place a piece of press and seal over the backing sheet.


Step 4:  Place baking sheet in the freezer until frozen.  Once frozen you can transfer the pieces into Ziplocs.  Or just eat them. 


The process worked great!  I now have several frozen bananas and little frozen pieces for smoothies.  They taste great too and kept my bananas from going bad.  I love this.  I ate two whole bananas today in fact, couldn't help myself.  Next stop?  Dipping them in chocolate for the hubby.  Wish me luck.